Tiki Central / Other Crafts
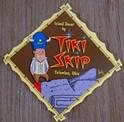
TIKISKIP : How to make tiki light, Lamp 101
|
TM

Trader Mitch
Posted
posted
on
Thu, Jun 16, 2011 3:51 PM
wow! Lovin' the burlap/paper combo. Did the burlap come with that loose weave or did you alter it? |
|
T

tikiskip
Posted
posted
on
Thu, Jun 16, 2011 4:09 PM
"I imagine that you would shellac the fabric or burlap after it were in place" Got the burlap at Franks Cane and rush I think. Lights are kind of different than say doing ceramics the mug maker can show |
|
T
tikiskip
Posted
posted
on
Thu, Jun 16, 2011 4:10 PM
"Did the burlap come with that loose weave or did you alter it?" It came that way. |
|
S

spiked
Posted
posted
on
Thu, Jun 16, 2011 8:17 PM
You are right, and I don't think you have to share ALL you know, but thank you for starting this thread. I personally think it's part of art and fun trying to figure out how it is done, without getting all the tips. This is how you learn, and if you have desire and passion to do, whatever it may be, you will figure out your own way how. :) |
|
TM
Trader Mitch
Posted
posted
on
Thu, Jun 16, 2011 9:16 PM
Well, being the dumb-ass newbie I am , I didn't even know there was a "tiki light sales game". I just thought everyone made their own. That's my plan anyways. But never having made one before, I'll gratefully accept any info you are willing to share Tikiskip. Your work is inspirational. |
|
M

MadDogMike
Posted
posted
on
Thu, Jun 16, 2011 9:22 PM
TikiSkip, don't sell yourself short - Tiki lights are not all technique. While technique and supply are important, you have been successful mostly because of your creativity and your eye for design :) |
|
TM
Trader Mitch
Posted
posted
on
Thu, Jun 16, 2011 9:38 PM
I agree with MadDogMike! Anyone can slap a hat on a basket and call it a lamp. Your work has a nice layered style and balance of shape/color to it. |
|
S
spiked
Posted
posted
on
Fri, Jun 17, 2011 10:03 AM
Oh, absolutely! I agree with what Mike and Mitch said above, you do have a certain style and signature touch to all of your lamps, very recognizable and very well thought out process to everything and always inspiring. :) |
|
H

harro
Posted
posted
on
Fri, Jun 17, 2011 3:18 PM
tikiskip, i've admired your lights on TC for many years. But now my appreciation of your efforts has skyrocketed - not just by showing all the necessary steps you go through, but to actually take the time and hassle to record it all for posterity and share with the rest of us here so we can attempt to have a go and have some fun along the way. Bravo and thank you - I look forward to making some of these lamps in the future. Please keep up the great work. harro |
|
T
tikiskip
Posted
posted
on
Sat, Jun 18, 2011 8:10 PM
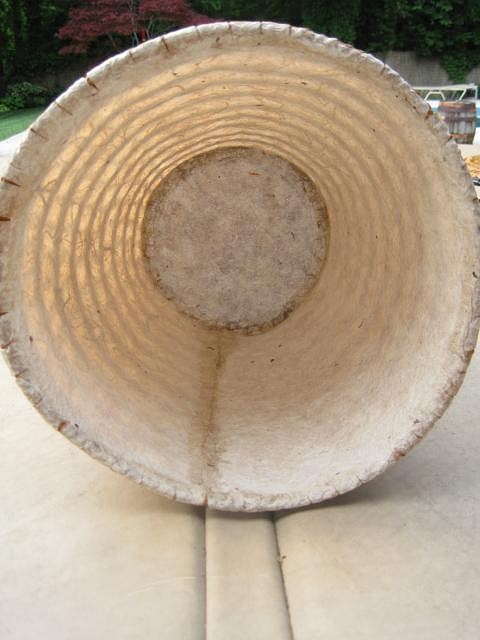
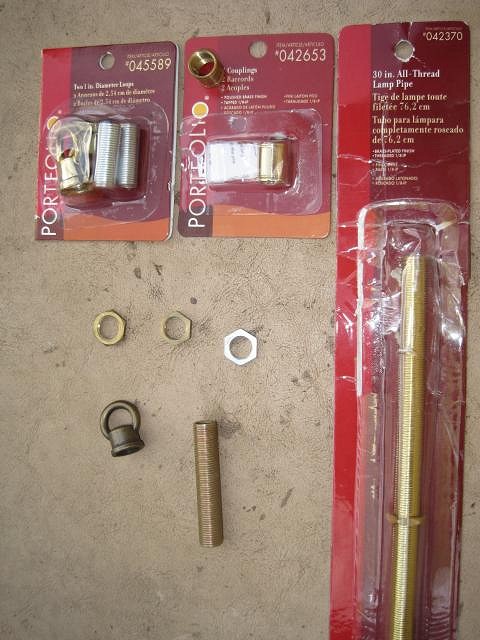
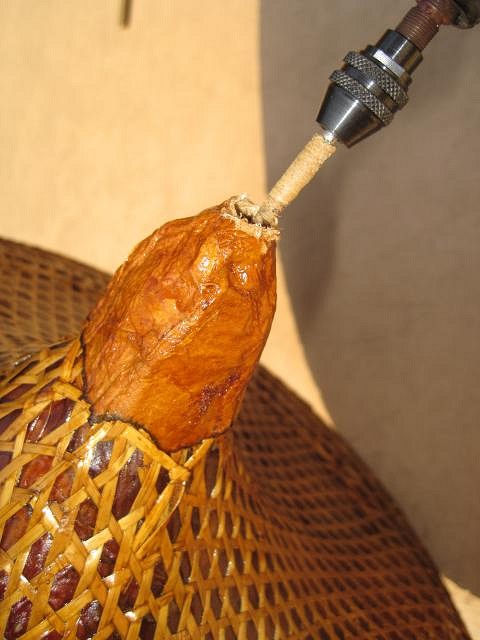
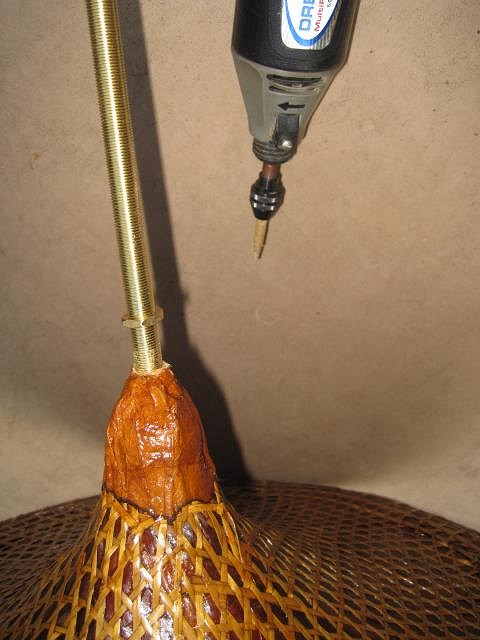
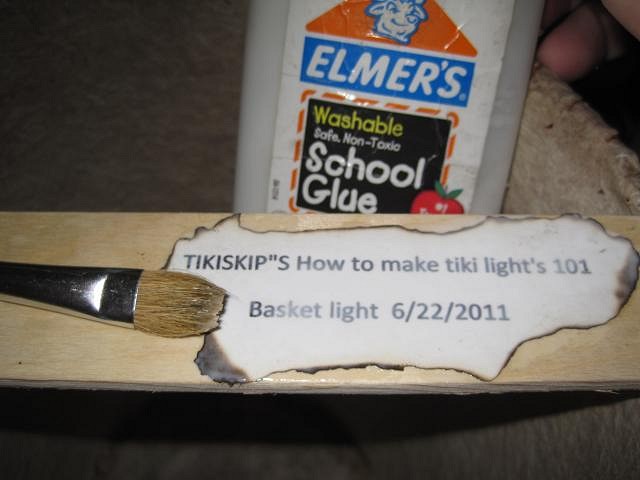
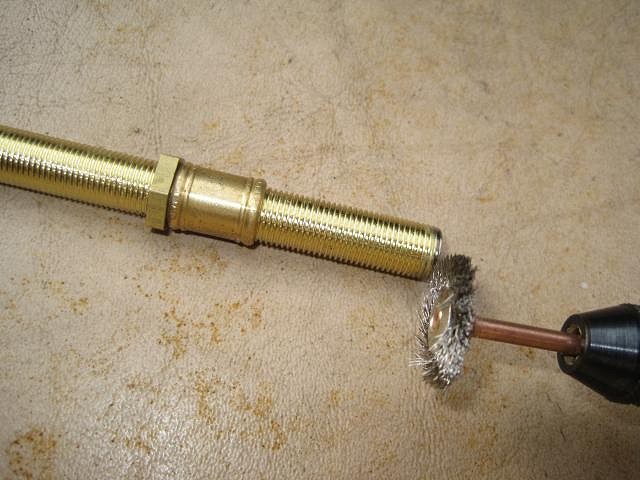
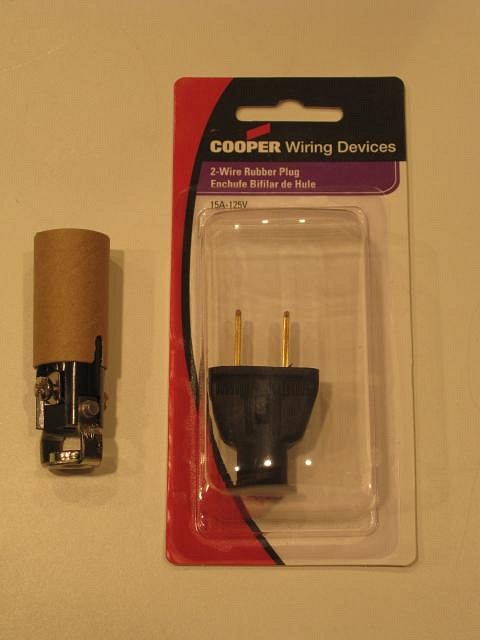
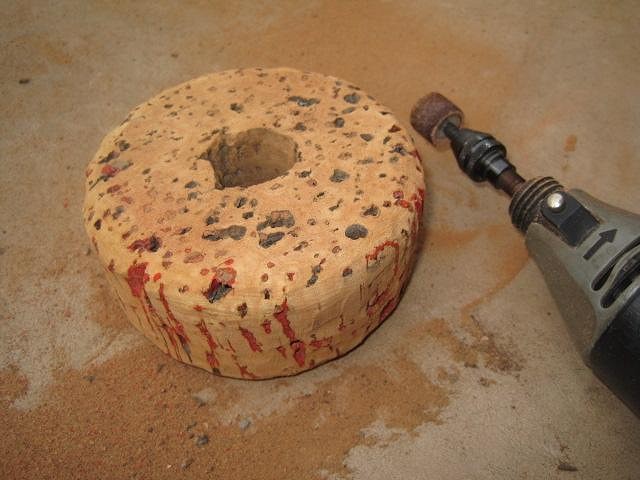
Wow you guys are going to give me a fat head. Let's get back to that light. You will need the items in the picture below. Next you need to put a hole in the top of the hat. [ Edited by: tikiskip 2011-06-23 15:09 ] |
|
T
tikiskip
Posted
posted
on
Wed, Jun 22, 2011 7:51 AM
This n [ Edited by: tikiskip 2013-11-18 08:32 ] |
|
T
tikiskip
Posted
posted
on
Thu, Jun 23, 2011 3:24 PM
You [ Edited by: tikiskip 2013-11-18 08:33 ] |
|
T
tikiskip
Posted
posted
on
Thu, Jun 23, 2011 3:36 PM
To add your logo or to just put your name on your light. TIKISKIP lights worldwide, "over 200 made" next one to you. [ Edited by: tikiskip 2012-12-12 12:59 ] |
|
T
tikiskip
Posted
posted
on
Fri, Jun 24, 2011 3:09 PM
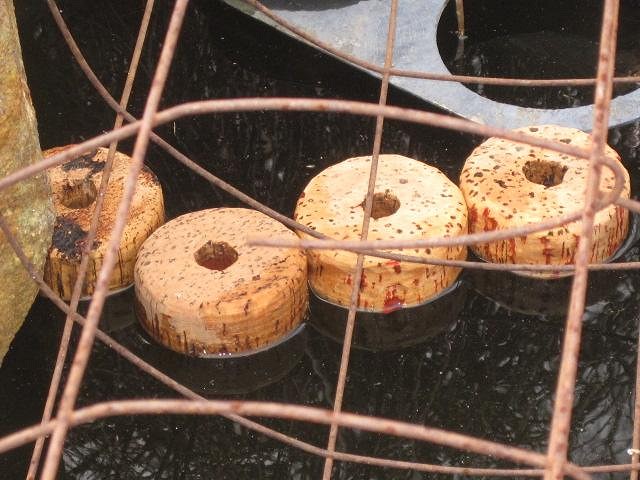
Cut the bamboo skewers flush with the basket. "Roses are red, these floats are blue, Send me some money and they belong to you"..."TIKISKIP" [ Edited by: tikiskip 2012-12-12 13:32 ] [ Edited by: tikiskip 2013-11-18 08:35 ] |
|
T
tikiskip
Posted
posted
on
Fri, Jun 24, 2011 3:31 PM
TIKISKIP lights worldwide, "over 200 made" next one to you. [ Edited by: tikiskip 2013-11-18 08:40 ] |
|
TM
Trader Mitch
Posted
posted
on
Wed, Jun 29, 2011 7:21 AM
Great stuff Tikiskip, keep it coming. [ Edited by: Trader Mitch 2011-06-29 07:22 ] |
|
T
tikiskip
Posted
posted
on
Wed, Jun 29, 2011 8:39 AM
Thanks Mitch,
[ Edited by: tikiskip 2011-06-29 08:41 ] [ Edited by: tikiskip 2013-11-18 08:38 ] |
|
L

littlegiles
Posted
posted
on
Wed, Jun 29, 2011 10:38 AM
Great, great GREAT tutorial. Thanks so much for doing that and sharing your knowledge. I don't think I have any questions right now, but I'm sure I will once I actually start making a light. I have some ideas, now need time and space to do them. :) Thanks again for a great job. |
|
M

Murph
Posted
posted
on
Wed, Jun 29, 2011 10:54 AM
THANKS! Great thread. I'm basket shopping this weekend! |
|
K

ka'lenatiki
Posted
posted
on
Thu, Jun 30, 2011 7:39 AM
great post tikiskip! glad to see someone take on lamp building. Now if I can just get the hat/basket match done I'm on my way. |
|
T

Traderpup
Posted
posted
on
Thu, Jun 30, 2011 8:11 AM
Really good job with the tutorial! Great, now the market is going to be flooded with cool homemade lamps! :) |
|
TM
Trader Mitch
Posted
posted
on
Sat, Jul 2, 2011 9:18 AM
Thanks so much Tikiskip! |
|
T
tikiskip
Posted
posted
on
Thu, Oct 20, 2011 1:00 PM
Thanks all, Ok Lets look into light sockets I know I hit on this "Roses are red, these floats are blue, Send me some money and they belong to you"..."TIKISKIP" [ Edited by: tikiskip 2012-12-12 13:33 ] |
|
T
tikiskip
Posted
posted
on
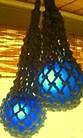
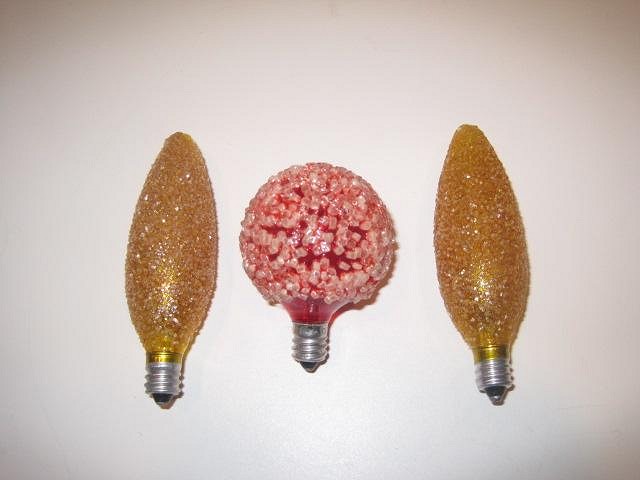
Sun, Nov 25, 2012 9:42 AM
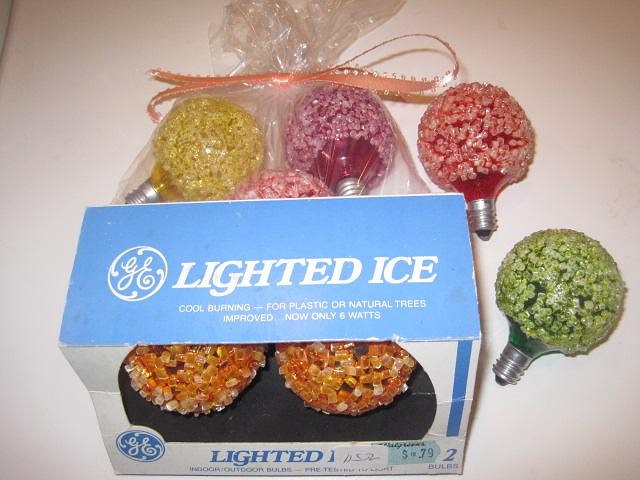
Next is the light bulb. The first blub we will look at is the snow globe or also called Lighted Ice. (see first photo) Next is the Starlight bulb, Seen left and right of the Snow globe bulb. TIKISKIP lights worldwide, "over 200 made" next one to you. [ Edited by: tikiskip 2012-12-12 12:56 ] |
|
K

KAHAKA
Posted
posted
on
Sun, Nov 25, 2012 11:53 AM
Those bulbs are crazy looking. Never seen anything like those. Nice find, and nice lamp too! |
|
T
tikiskip
Posted
posted
on
Sun, Nov 25, 2012 5:06 PM
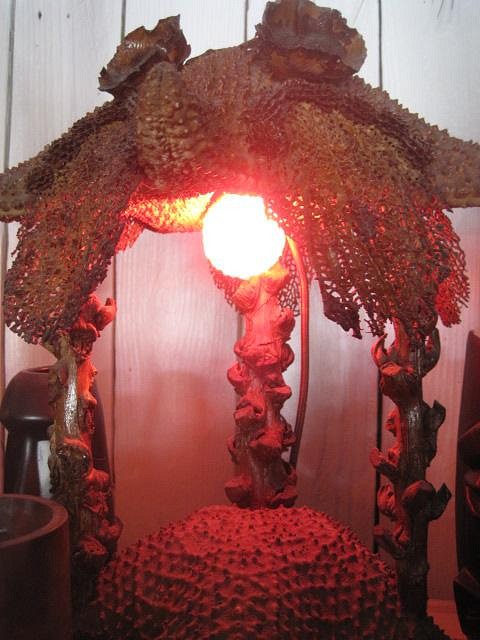
Kahaka that is what I call a starfish lamp. "Roses are red, these floats are blue, Send me some money and they belong to you"..."TIKISKIP" [ Edited by: tikiskip 2012-12-12 13:34 ] |
|
T
tikiskip
Posted
posted
on
Wed, Nov 28, 2012 9:51 AM
Here's a Coconut lamp now on ebay, Not my auction. TIKISKIP lights worldwide, "over 200 made" next one to you. [ Edited by: tikiskip 2012-12-12 12:57 ] |
|
T
tikiskip
Posted
posted
on
Fri, Feb 1, 2013 7:23 AM
Here's a new one. ¤(¯ |
|
T
tikiskip
Posted
posted
on
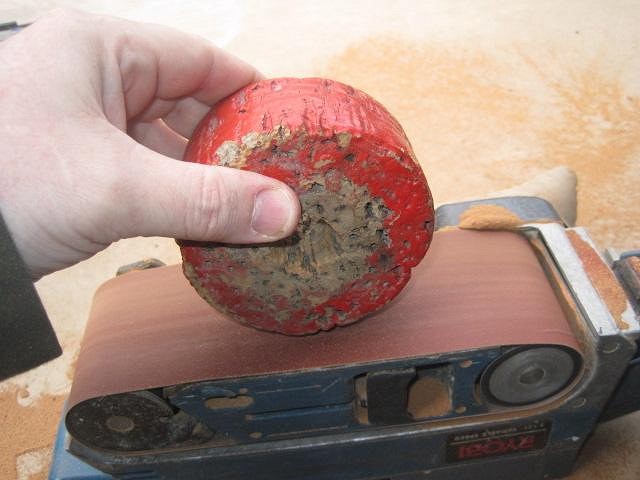
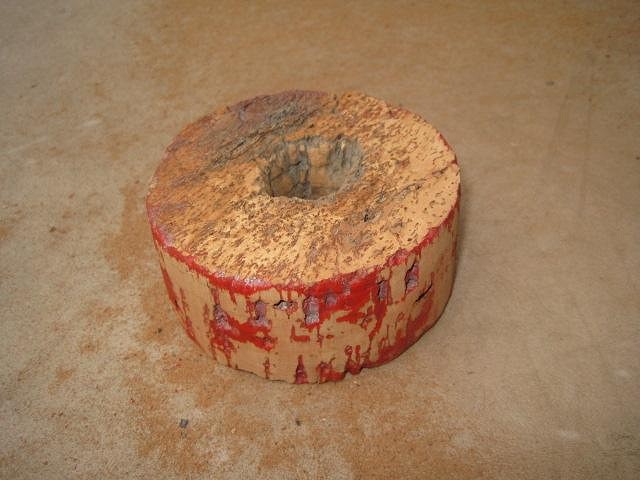
Mon, Feb 4, 2013 8:27 PM
After you sand lightly with the belt sander next -:¦:-•:'"":•.-:¦:-•:TIKISKIP:•-:MAKES:-•:TIKI*:•-:LIGHTS:-•:'"":•.-:¦:-* Lights for home and |
|
HT

Hale Tiki
Posted
posted
on
Tue, Feb 5, 2013 4:32 AM
Skip, |
|
T
tikiskip
Posted
posted
on
Tue, Feb 12, 2013 2:55 PM
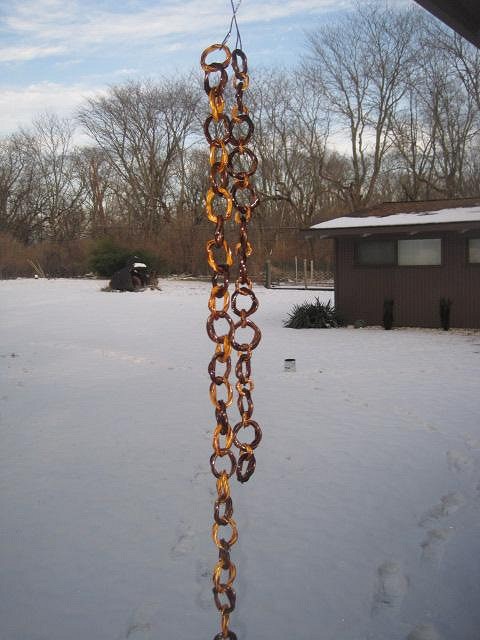
Thanks Lucky, but I don't have much patience. I did get a chance to make some rattan chain. •:''':•:''':•:''':•:''':•:''':•:''':•:''':•:''':•:''':•:''':•:''':•:''':• |
|
HT
Hale Tiki
Posted
posted
on
Wed, Feb 13, 2013 3:20 AM
I've had success at work with using a combination of paint and stain, severely watered down. There's a grey stain, that on the can, makes it look like bleached wood. Can't remember who makes it right, now, but you can get it at every Lowe's. Anyway, it sucks. It looks awful. I got it for aging wood, and was severely disappointed. It's not the grey Minwax. HOWEVER, if you water it down quite a bit, and alternate between two layers of that, and a layer of watered down black acrylic, you can get some pretty decent aging. I can't post pictures, unfortunately, as I've only done it for work, but get a cork stopper and give it a try. I'll look at the can of stain this week and let you know what brand. Minwax has one, but it's a lot more gentle to begin with, and may even work. Dunno, haven't tried it. (Also, I'm right there with you. If I could spray on age to just about any material, I would. But since I can't, time and the real thing have to do.) |
|
AM

Atomic Mess
Posted
posted
on
Wed, Feb 13, 2013 5:24 AM
Saw this a while ago Skip, don't know if it would work on cork... I really enjoy your lamp making tips btw! [ Edited by: Atomic Mess 2013-02-13 05:24 ] |
|
H

HellGhost
Posted
posted
on
Mon, Jul 27, 2015 10:58 AM
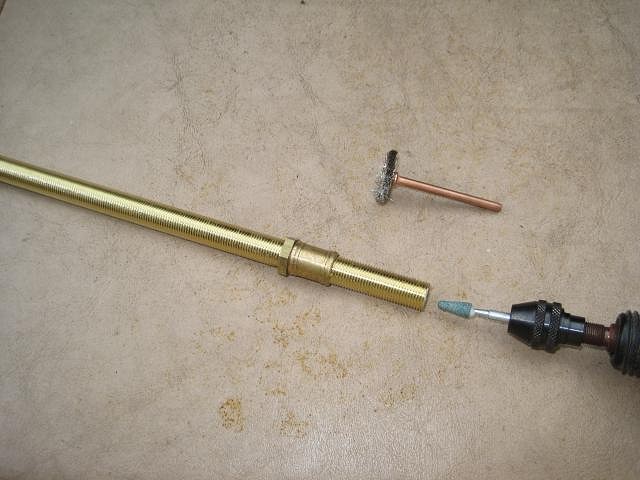
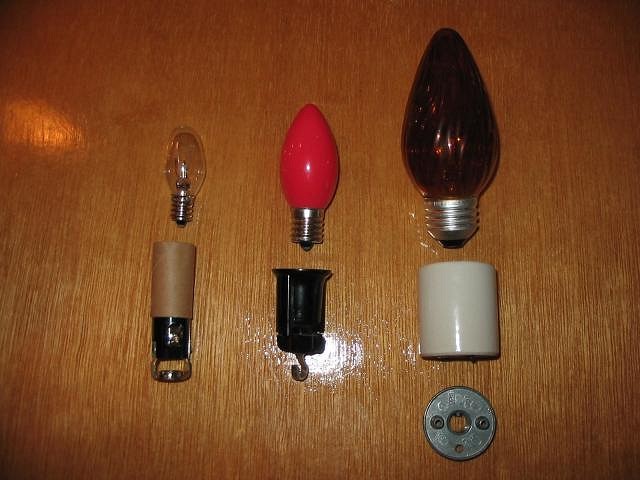
Yes Question please....How do you take it apart to replace the light? I see you sometimes you just use Tapa wrapped around...something...what to you make the frame of in this case? I thought I was some type of screen? Do you just drop the light with the threaded extender and that is stable enough to hold the bulb? It looks like parts of this post got deleted? Any Chance of restoring it? Thank you very much for your time in posting this. -Cheers |
|
T
tikiskip
Posted
posted
on
Mon, Jul 27, 2015 11:45 AM
Yeah this was some time ago. "I see you sometimes you just use Tapa wrapped around...something...what to you make the frame of in this case? I thought I was some type of screen?" Well sometimes you glue to a basket or shells, tapa is often used to hide a joint or "Do you just drop the light with the threaded extender and that is stable enough to hold the bulb?" Yes and Yes. "It looks like parts of this post got deleted? Any Chance of restoring it?" Will give it a look. Thanks and Good luck. |
|
B

Biotron2000
Posted
posted
on
Mon, Jul 27, 2015 12:44 PM
I read 'em, even if I don't reply a lot. But this was a great thread, I'd love to see more! |
|
H
HellGhost
Posted
posted
on
Tue, Jul 28, 2015 6:59 AM
I think I'm just asking the questions wrong. I understand about the top nut the chain attaches to it unscrews and you have access to the threaded tube. But how does the hat stays attached to the bottom basket. If they are glued together you would not have access to the inside. Is there some kind of frame that is attached to the top of the basket? Is there some way that the bottom basket and the hat are linked together? Some kind of hooks? Anyone that's done this I'd love help I don't want to annoy Skip too much...haha. |
|
T
tikiskip
Posted
posted
on
Tue, Jul 28, 2015 7:36 AM
Sorry I do get kinda bored with things and then drop em. Kind of like the thrill is gone. Thanks for your interest. Good luck. [ Edited by: tikiskip 2015-07-28 13:11 ] |
|
H
HellGhost
Posted
posted
on
Tue, Jul 28, 2015 1:07 PM
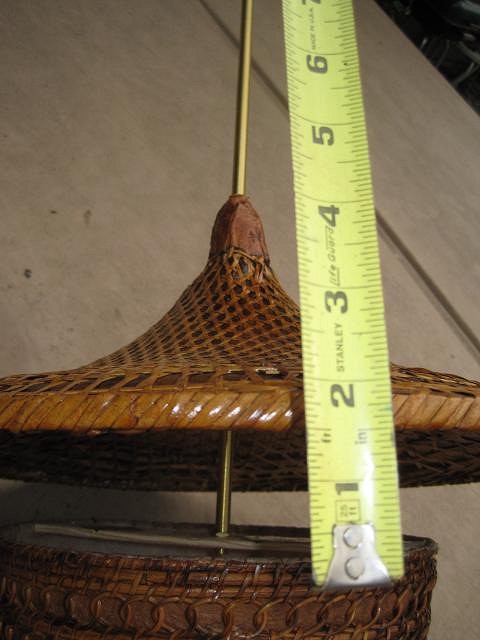
Aloha Skip! Thank you! That is the missing photo now I understand! I thought I was being a knucklehead and missing something....the board across. There are no photos of this on the post looks like the are deleted. Your patience is amazing and MAHALO!!!! |
|
MAM

mike and marie
Posted
posted
on
Tue, Jul 28, 2015 9:36 PM
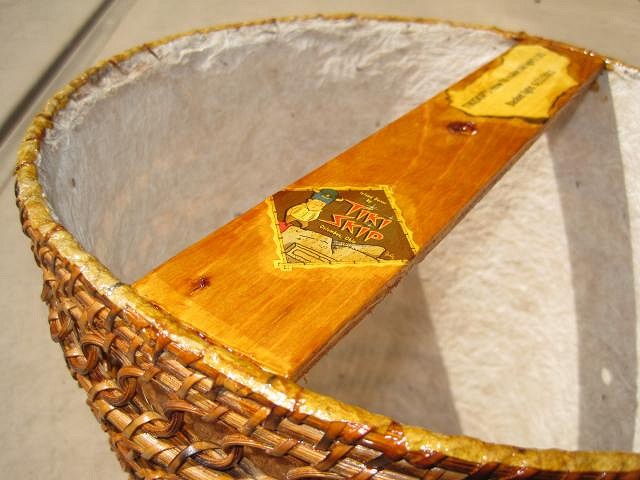
This thread is now #1 on our "to study" list. Threads like this are what make TC great! Love that you put your maker sticker inside the lamp. And that board that it's stuck to, looks like it's got the happy color of orange shellac. |
|
EJ

El Jefe
Posted
posted
on
Tue, Jul 28, 2015 9:48 PM
Thanks for all you share Skip. |
|
T
tikiskip
Posted
posted
on
Wed, Jul 29, 2015 4:44 AM
"it's got the happy color of orange shellac" Yes it does. Thanks to you too El Jefe. Not much tiki building going on, trying to get as much |
|
R

RVICTOR
Posted
posted
on
Wed, Jul 29, 2015 6:15 AM
Hey skipper, Hope summer is fun for you. It's been a real daze here...just flying by. Cutting into my production as well. Just gotta enjoy it while it's here. Always fun reading your posts. |
|
H
HellGhost
Posted
posted
on
Thu, Jul 30, 2015 12:23 AM
So I have clearly been a lurker a long time...I came across these things at a place called World market. They are use to cover dinner plates I guess...Link > I bought 2 of each of the coconut and bamboo.(the bamboo one is not showing but I got 3 at my store today) They are marked 75% off right now...The coconut one is way cool and has a light metal frame inside. They also had some way cool round lantern that match it to make a bottom it was 75% off too... I also saw these I'm sure it's not a big deal you but I thought it was brilliant...The price is stupid but the idea is priceless I think? Hope I'm not braking any rules...And Skip Thank you for the inspiration your awesome! -Ghost |
|
T
tikiskip
Posted
posted
on
Thu, Jul 30, 2015 7:46 AM
Those could work. The trick is not to let people go "oh I see that is a Mayonnaise jar" But it needs to look like it was supposed to be a light, not hold Mayonnaise. An old bottle or jar that has interest because of it's age may work just stay away from the If you are going to use Flotsam and Jetsam on your light make sure it is cool Flotsam and Jetsam. Good luck, post pics of what you make. |
|
R
RVICTOR
Posted
posted
on
Thu, Aug 20, 2015 7:12 AM
Skip-Just wanted to let you know that I found this Tiki Skip "How To" Lamp School thread a bit enthralling. I don't know how many times I've been back checking it out now. I know you started a while back...but I wanted to mention that there is interest out there for whatever you would like to share. Your a top artist in the tiki genre and any knowledge you can pass on to those of us interested in it is greatly appreciated. |
|
T
tikiskip
Posted
posted
on
Fri, Aug 21, 2015 7:49 AM
Thanks RVICTOR. I have been trying to get ideas and light making how to down on paper as there is May start making and selling in the fall. But for now.... [ Edited by: tikiskip 2015-08-21 07:49 ] |
|
R
RVICTOR
Posted
posted
on
Tue, Aug 25, 2015 9:52 PM
Well...after watching that clip I feel like an old man. Tell you what...At some point I would really like to get my hands on one of those cool cork and float lights of yours...so when you are feeling more "brown"...we should talk. Your lamps are the coolest skip. And if your contemplating a book, you should give the thing a cover that looks like a stone tablet with a bamboo binding. |