Tiki Central / Home Tiki Bars
Hapa Haole Hideaway Rebuild Again! - Open
|
CAA

Chip and Andy
Posted
posted
on
Sun, Nov 2, 2008 8:23 AM
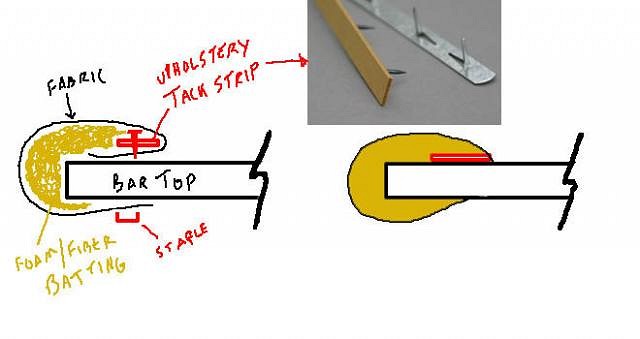
1 - Stand in front of the 'customer' side of the bar. 2 - Lay the fabric out with the good side against the bar top. Line up the edge closest to you with the edge of the bar, the fabric should drape towards/over the 'working side of the bar. 3 - Attach with tack-strip, staples, really good glue, or some combination therein. 4 - Attach your padding to the customer edge of the bar and pull the fabric over the padding. This will conceal the tack-strip/nails/glue. 5 - starting from the center of the bar, pull the fabric tight and staple to the underside of the bar. Work from the center towards the edge, go a little bit in each direction, then the other, etc until you get to the end. Staple at a 45 degree angle to the edge, the attachment will be more durable ( like this | \ \ \ \ \ \ , not - - - - - - -, and not | | | | | | | | | | ) 6 - If the end of your fabric on the underside is close to the edge, you will want to put a strip of something to cover the edge so that you don't rub body-parts or clothing against the area where the staples are. You should now have a beautiful bumper on your bar that should last a good long time. And, if the padding you use starts to breakdown over time, you can pull the staple from the underside of the bar and add new with only a bit of work. |
|
S

Swanky
Posted
posted
on
Sun, Nov 2, 2008 8:26 AM
Yeah, Ms Swanky and I hashed it out this morning more. Didn't know about the tack strip. Makes lots more sense for getting it straight and holding it down. We plan to make the arm rest s seperate piece that can be removed and repaired, maybe. I think we decided to tile to bar top, which mean maybe doing the top of Hardi Backer or something besides plywood. Another trip to Lowes. They just never end. |
|
S
Swanky
Posted
posted
on
Sun, Nov 2, 2008 11:32 AM
|
|
M

millerz1897
Posted
posted
on
Sun, Nov 2, 2008 3:20 PM
Rock on! |
|
S

sungod
Posted
posted
on
Sun, Nov 2, 2008 4:29 PM
That is one talented cat. |
|
M

MsSwanky
Posted
posted
on
Mon, Nov 3, 2008 5:44 AM
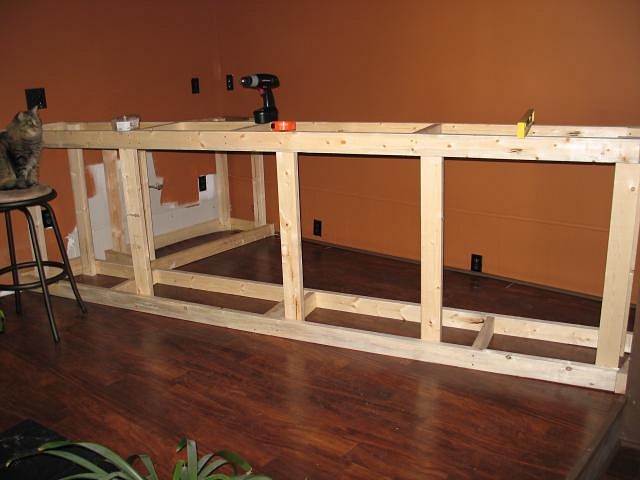
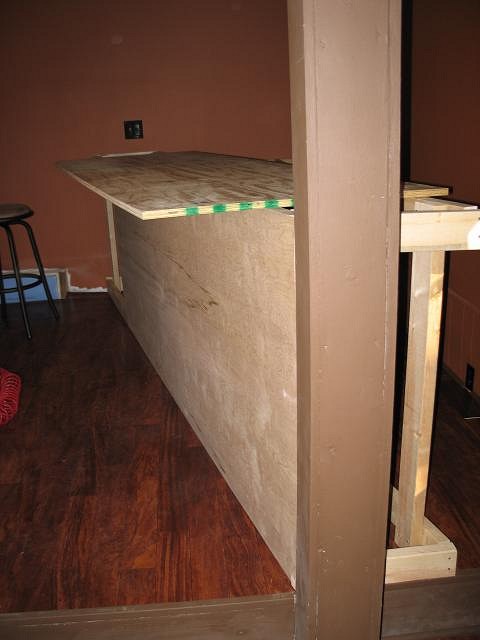
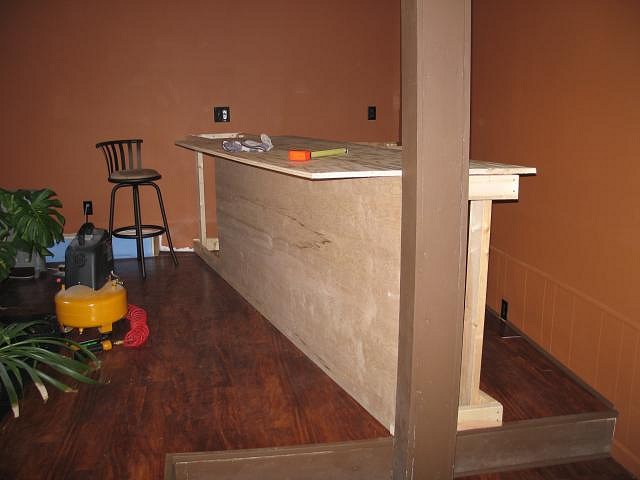
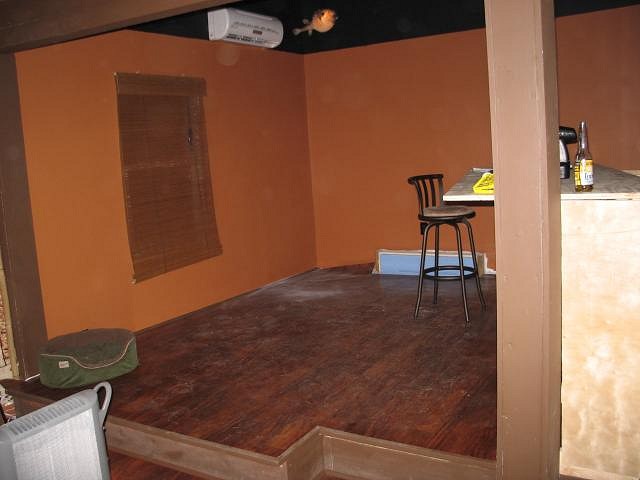
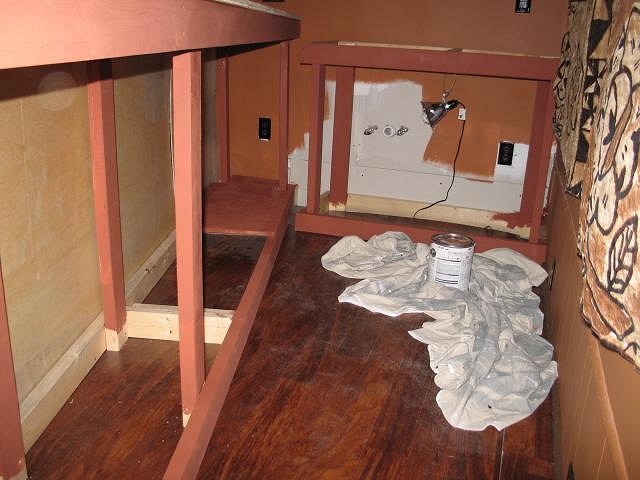
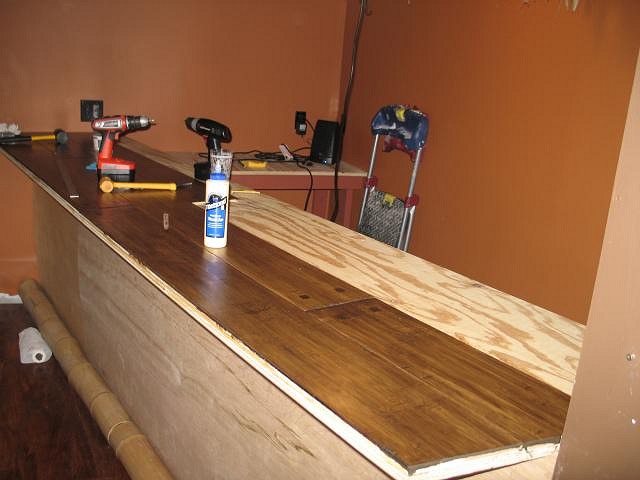
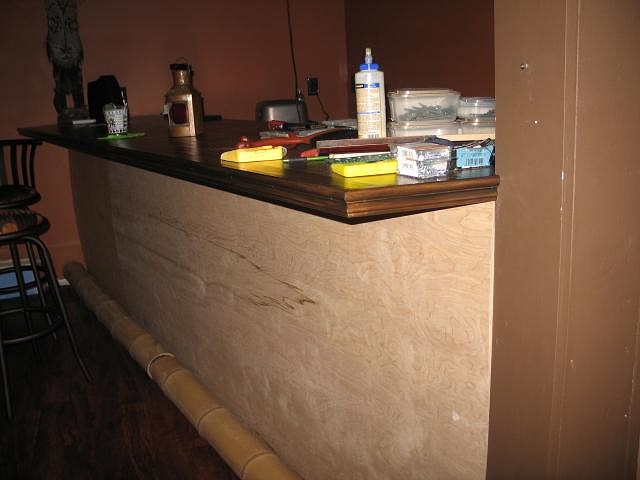
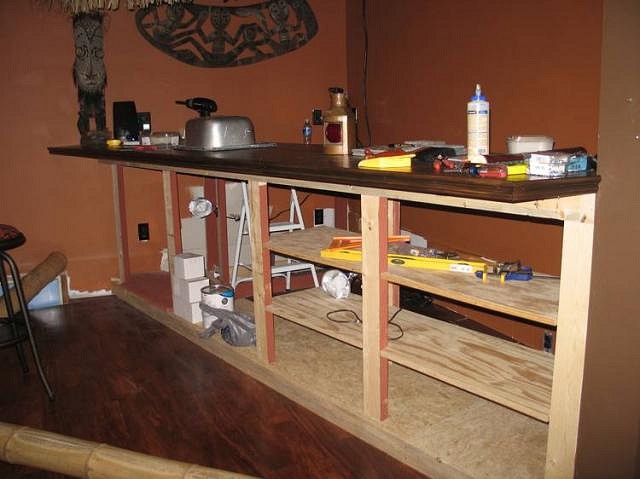
Swanky was hard at work on the bar yesterday while I was out buying up tons of Halloween decor on sale. 'Came home to see the bar in full scale. Up to this point we've just had measuring tape laid out on the floor as sort of a pattern for the bar - seeing it built up, all 40 inches tall and 10 feet long, really changes the perspective...** this thing is mammoth!** |
|
RH

Robb Hamel
Posted
posted
on
Mon, Nov 3, 2008 6:52 AM
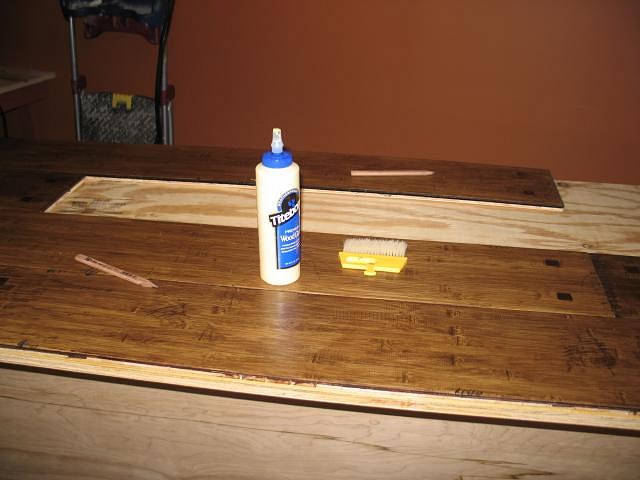
MsSwanky - for the bar top I like how poured resin looks. Real bars use that to create a super-thick clear surface that is hard to damage and ages well. One of the advantages is that you can use A/C plywood (plywood with a quality finish on one side). You stain the wood (done it, it looks great), pour the resin on, and you're done. The Kahiki used it, and a friend of mine has a bunch of their fifty-year-old tables and they still look great! Some pubs I saw in Ireland used resin, or something like it, and they were much older. |
|
H

Howland
Posted
posted
on
Mon, Nov 3, 2008 7:31 AM
I'm a big fan of the poured resin top too---done it m'sef. (You've seen it MS). It's coming together nicely! |
|
T

TabooDan
Posted
posted
on
Mon, Nov 3, 2008 7:50 AM
Great job on the room!! Its really coming together and looking good! Stick to a nice stained wood, planks or old wood that has character (Like your great old chest!) with alot of coats of finish. Minwax makes a nice Hellsman Marine finish that works good on Bar tops. Even some people like glass tops which enable you to change what you have underneath it. Your bar is probably a bit too big for this one but others may consider it. The resin finish looks great and is very durable. You can also color the wood underneath any color you like. It will also look much better with the padded arm rest like you wanted. Posted above is one of the best and easiest ways to do it. What a talented bunch on here!! It's really cool to see all the different ideas you get on here. Keep up the great work!! [ Edited by: TabooDan 2008-11-03 08:09 ] |
|
BK

Big Kahuna
Posted
posted
on
Sat, Nov 8, 2008 12:16 PM
Thanks for the detailed bar construction photos & description. I'm just about ready to start on mine & this is a big help! |
|
T

tikiskip
Posted
posted
on
Sat, Nov 8, 2008 2:19 PM
Hey Tim looking good!! |
|
S
Swanky
Posted
posted
on
Sat, Nov 8, 2008 6:41 PM
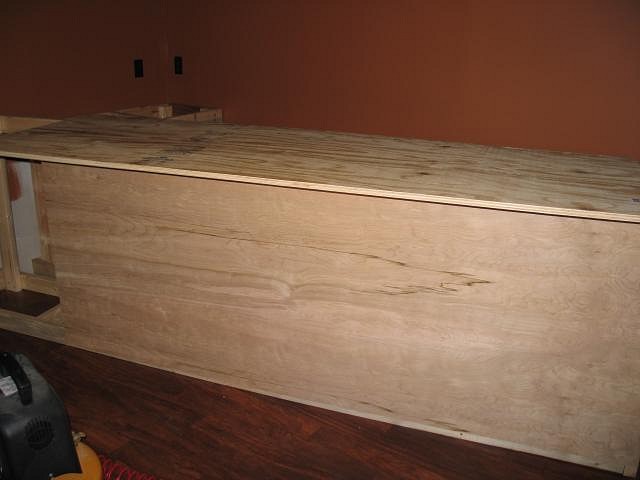
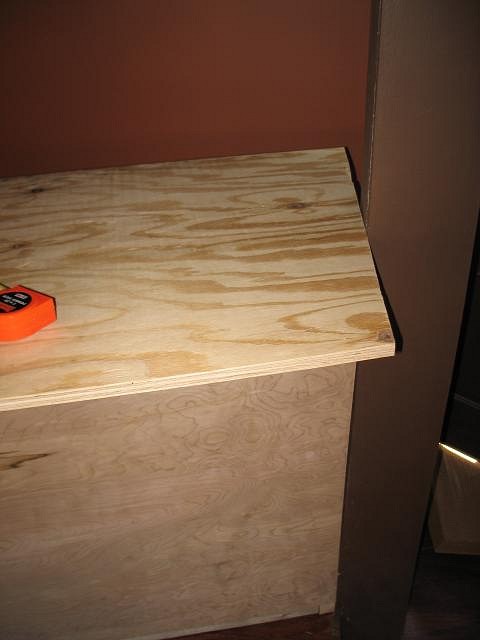
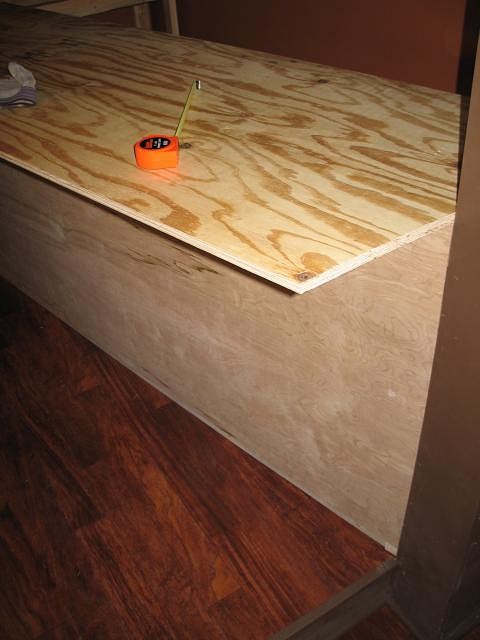
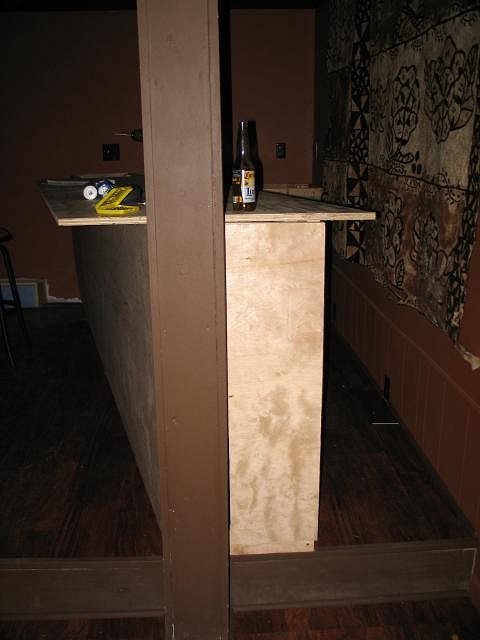
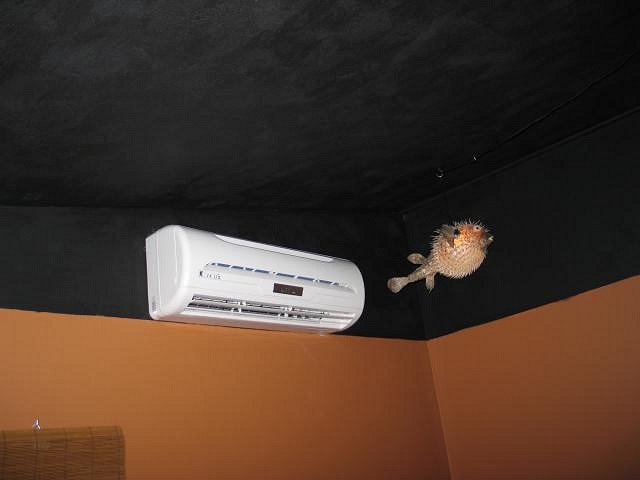
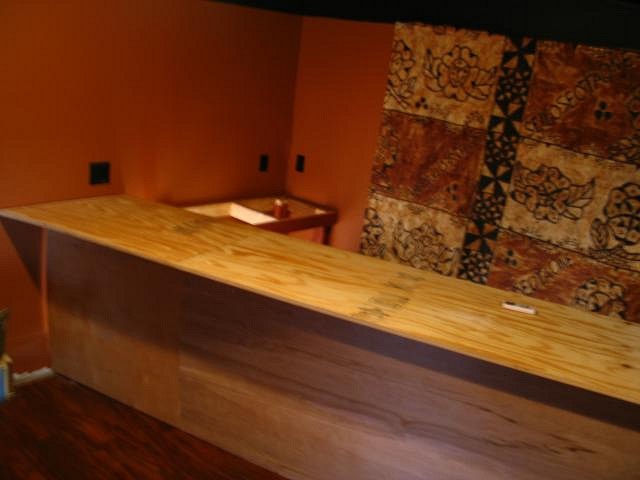
Thanks. I wanted to put the images and things on here that I myself wanted to see. We moved the bar top back to a 10 inch overhang instead of 12 and it makes a big difference visually. It'll be better. Also cutting an inch off the back so we have just a one inch overhang in back. That should still keep spills from running down the back. It makes the bar top much smaller. Skip, I think you are right. We have decided that the padded arm rest is not necesary and will be a big expense (4 yards of material is easily $100) and it'll be fine without it. Just do a more "plain" bar top with a trim edge. Might just stain the top wood, or, as you say, get a veneer. The mini split heat pump is going in tomorrow. May work on the foot rest tomorrow as well. Will update as we can. |
|
LS

Lake Surfer
Posted
posted
on
Sun, Nov 9, 2008 12:13 AM
Nice work! [ Edited by: Lake Surfer 2008-11-16 22:59 ] |
|
S
Swanky
Posted
posted
on
Sun, Nov 9, 2008 7:01 AM
Lake, I wish I could see that in person.... So, what's that wood? 2 x 4's that have been torched? Stained? Stained and torched? We need details mon! And I think we'll be putting in an order for the masks I asked you about. |
|
T
tikiskip
Posted
posted
on
Sun, Nov 9, 2008 8:34 AM
"That should still keep spills from running down the back. It makes the bar top much smaller" Tim you need to build that trough in the back of the bar top. |
|
S
Swanky
Posted
posted
on
Sun, Nov 9, 2008 1:34 PM
I've thought about that. The bar top is two layers and I can cut the top layer a few inches narrower and leave room for the little rubber thingies they put at the bar back. |
|
S
Swanky
Posted
posted
on
Sun, Nov 9, 2008 5:06 PM
|
|
LS
Lake Surfer
Posted
posted
on
Sun, Nov 9, 2008 9:55 PM
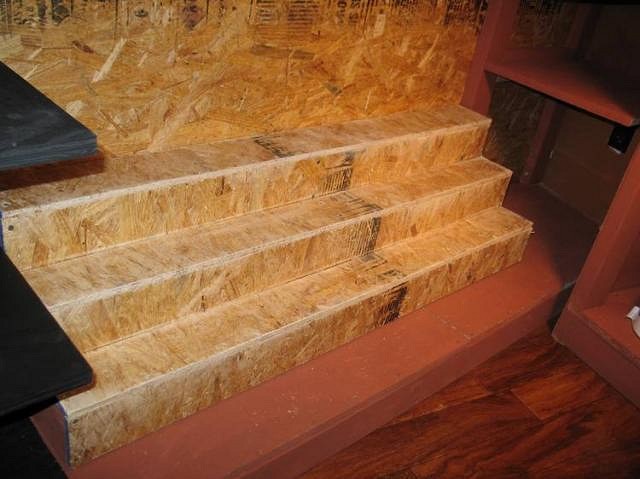
The whole room is coming together real nice, good work! Love the levels! [ Edited by: Lake Surfer 2008-11-16 22:59 ] |
|
S
Swanky
Posted
posted
on
Sun, Nov 16, 2008 5:11 PM
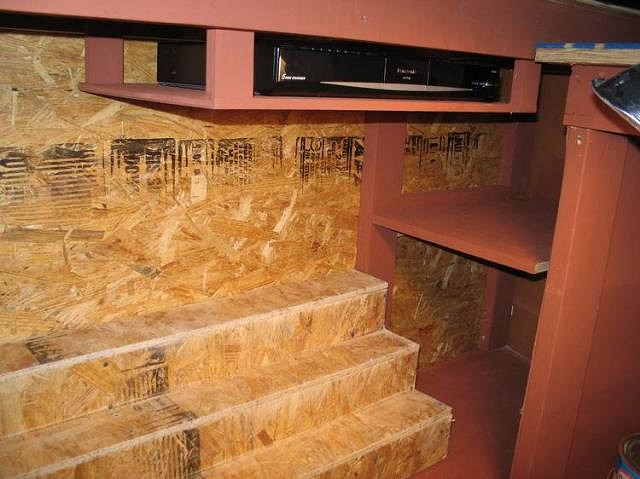
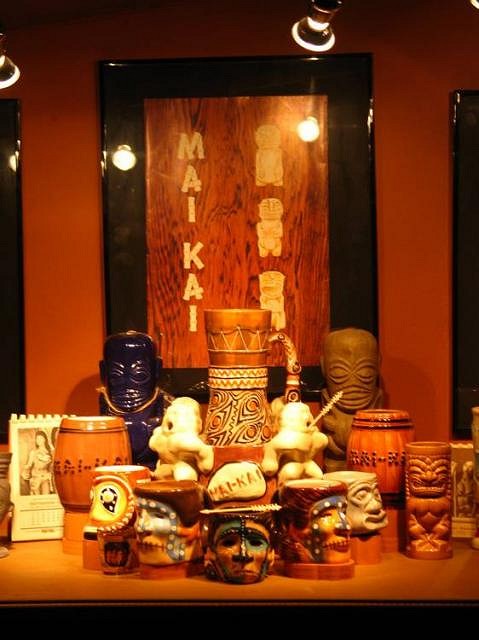
I also screwed the display shelf to the brackets and put the Guanko in it's cubby hole. We think we picked out a cheap but decent looking bar top material. We'll see. |
|
BK
Big Kahuna
Posted
posted
on
Sun, Nov 16, 2008 7:10 PM
Lookin' good, Swanky! Keep the pics coming! |
|
S
Swanky
Posted
posted
on
Sun, Feb 1, 2009 5:42 PM
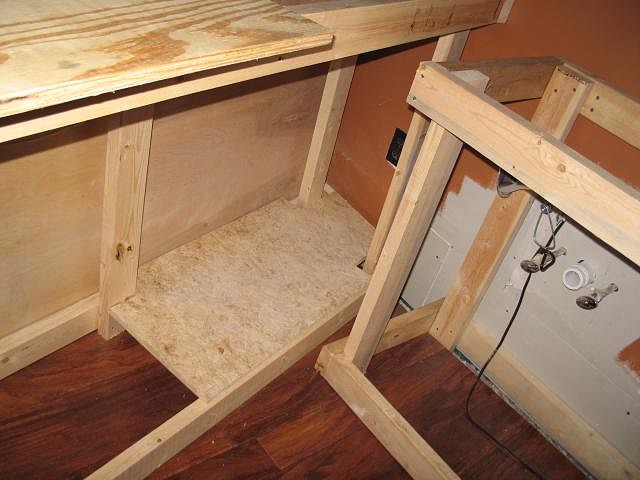
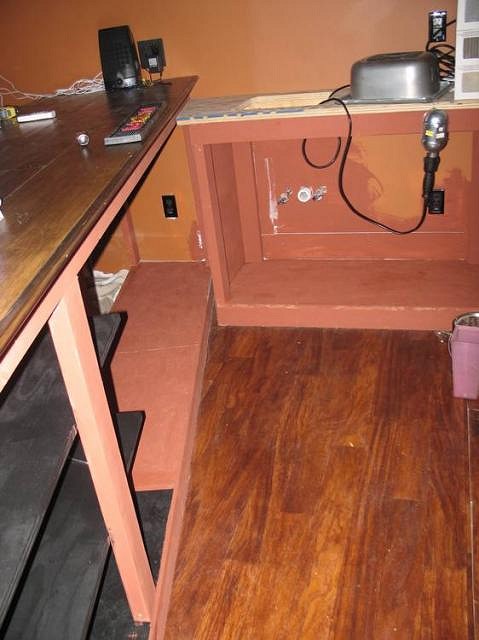
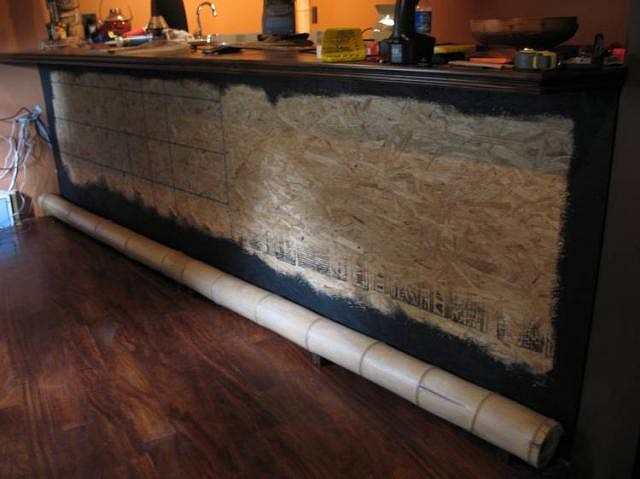
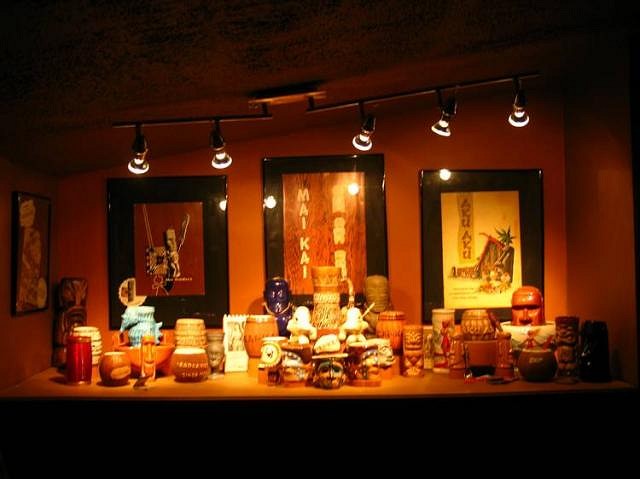
No real progress over the winter monthe, but poised to get in high gear as soon as we get warm weather again. Decided against building a standard box foot rest and instead we'll use 5 inch bamboo. Put some of the collection together on the shelf to start thinking about how to make a good display. And needing to do some repair. The pipe in this wall that goes out to the hose has a cutoff here under the bar. It froze in the 7 degree waether and I had to rip into the wall and still need to repair the leak. Wasn't too bad thankfully. Was afraid the whole floor would have to come out! Yikes. |
|
MPP

Mr. Pupu Pants
Posted
posted
on
Fri, May 1, 2009 10:59 PM
Hmmm...looks like it's time for an update. Yep. |
|
S
Swanky
Posted
posted
on
Sun, May 3, 2009 11:14 AM
Of course, that's after the wedding and the honeymoon. Probably in late June, early July. May clean up and have a little bachelor party in there when BK and Pablus are in town in a couple of weeks. |
|
MPP
Mr. Pupu Pants
Posted
posted
on
Sun, May 3, 2009 1:10 PM
Wow, I'm really sorry to hear that. Well, 'real life' has to barge in every once in a while :) The Tiki bar will still be there waiting when you come back, anyway. You know.....gnawing at the back of your mind........saying...Haaaave you checked underrrrr the floooooor?....and....Buuuuiiiiillllldd mmeeeeeeeeeeeee. |
|
S
Swanky
Posted
posted
on
Sat, Jul 4, 2009 12:32 PM
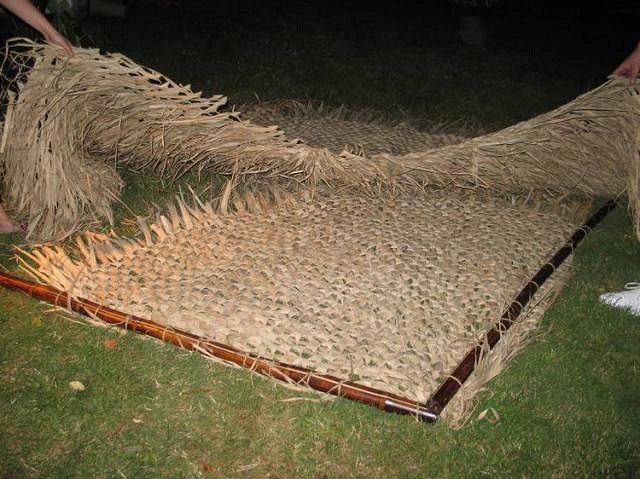
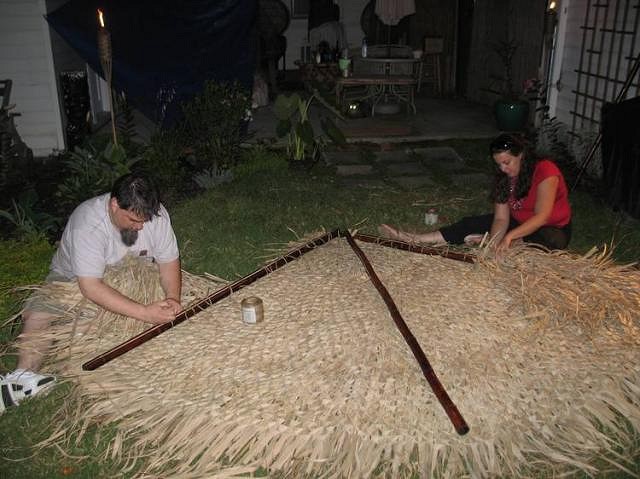
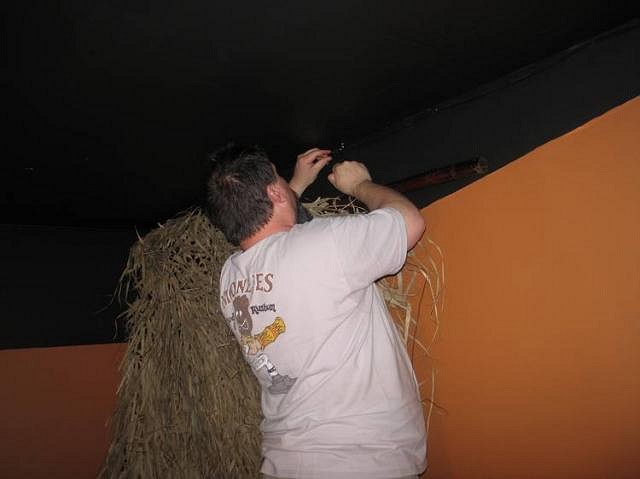
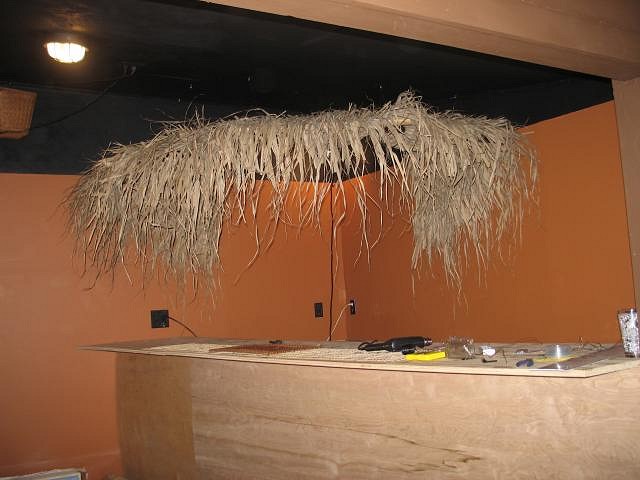
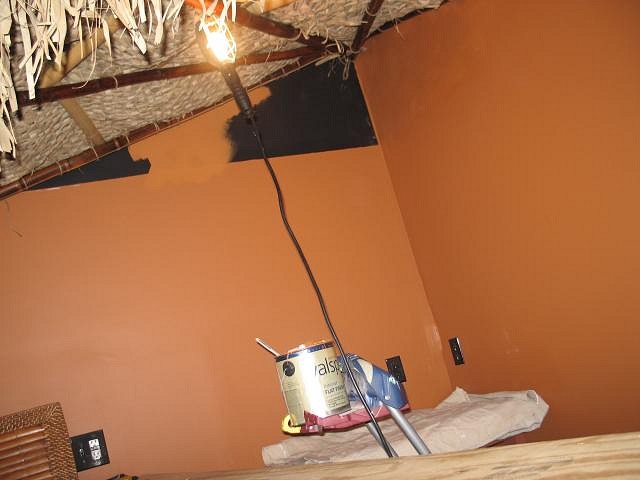
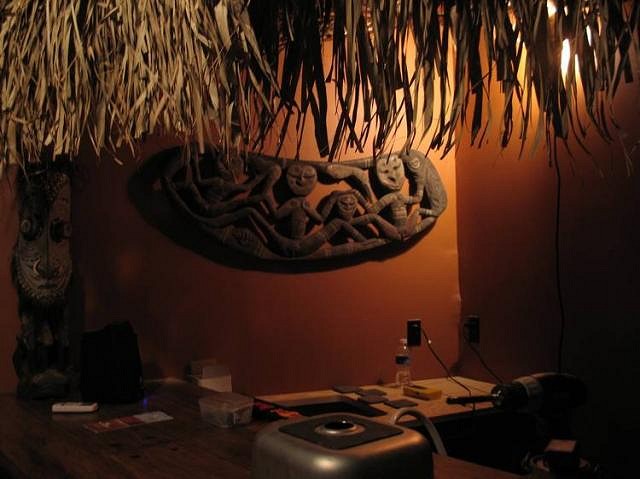
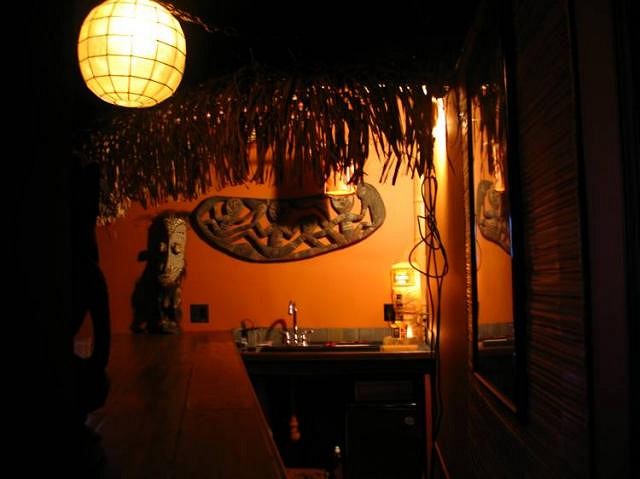
July 3rd: Adding a thatch "hut" over the bar area. I had a 9 foot thatch umbrella cover and a 6 foot area to cover. Had a bunch of stained bamboo poles we got at Pier 1 cheap. Started by cutting 1/4 of the thatch umbrella and attaching it to the 2 poles to make 90 degrees. Then took the remaining 3/4 of the thatch and added if overlapping the first piece. It is near invisible where they meet. Tied it to the poles and the thatch together with jute. Took 3 more poles and tied them together for the inner ribs.
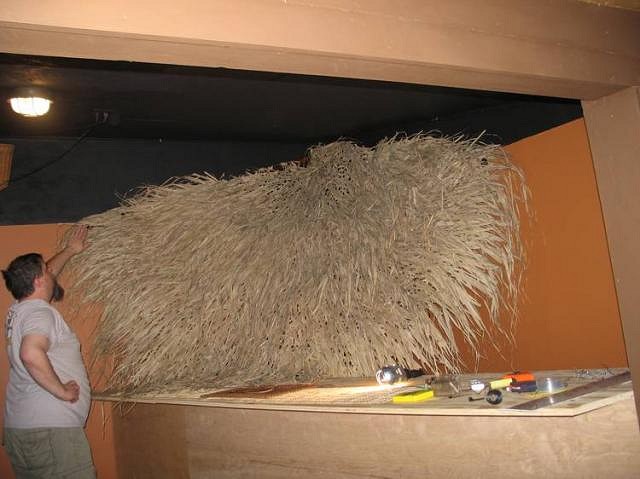
Chris attached the hub of the umbrella to a hook in the corner with wires run through the poles. Each end of the pole is connected to the ceiling by way of black galvanized wire and eye hooks. We put the holes a bit back from the end to make them more hidden. We attached the central poles to the corner hub and then began wiring them up to get the structure.
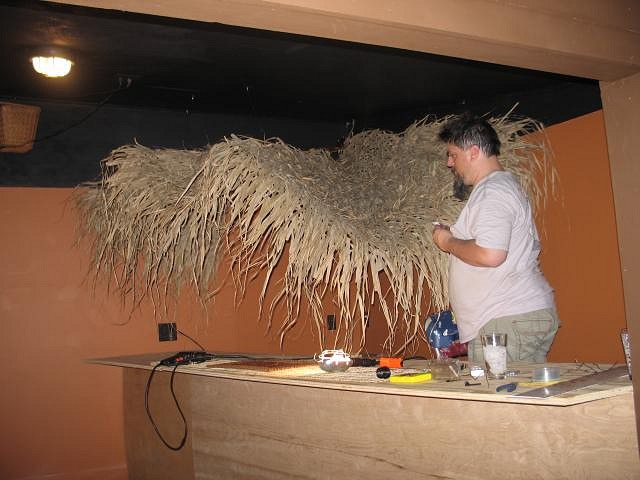
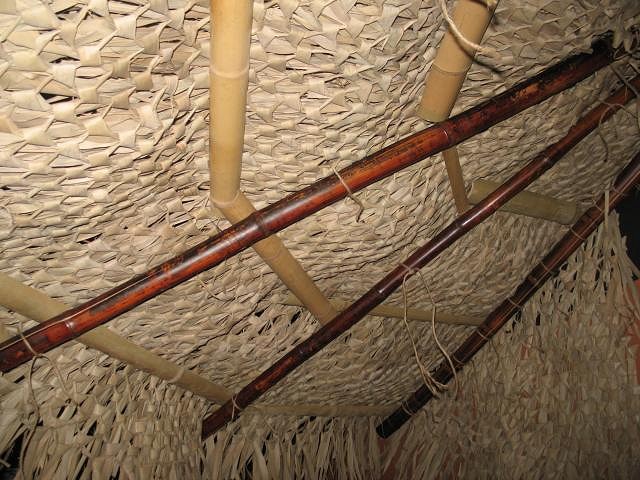
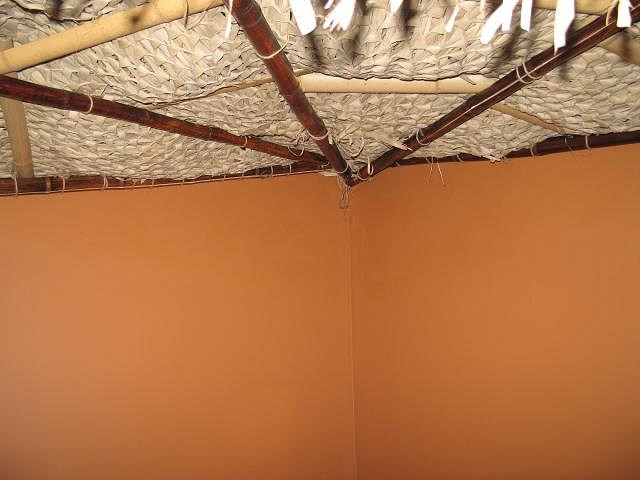
Very floppy looking. Once cross supports are added inside, it looks more right. Still needs trimmed and "finished. May overlap extar thatch on the end to make it thicker where it hangs off. Here is the underside. Those pieces of bamboo will be replaced with more of the stained and everything cut to fit and tied in place with jute. But there is still more to do above the thatch to wire in lamps, etc. so we are waiting. Just a few hours to kill on a vacation night. Making some progress. Hope to have to all open in September for a party. |
|
S
Swanky
Posted
posted
on
Sun, Jul 19, 2009 6:54 PM
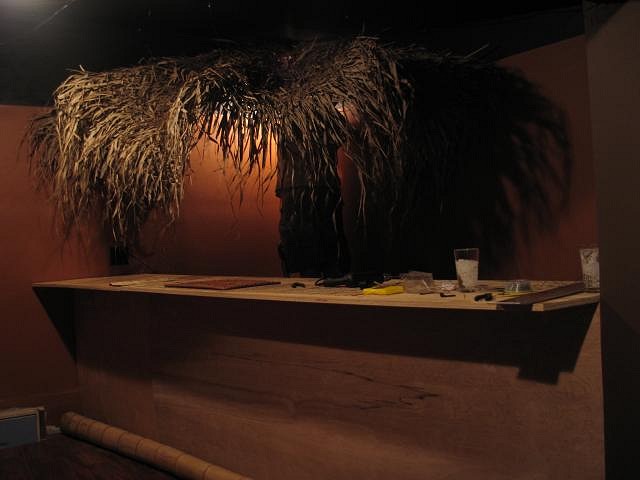
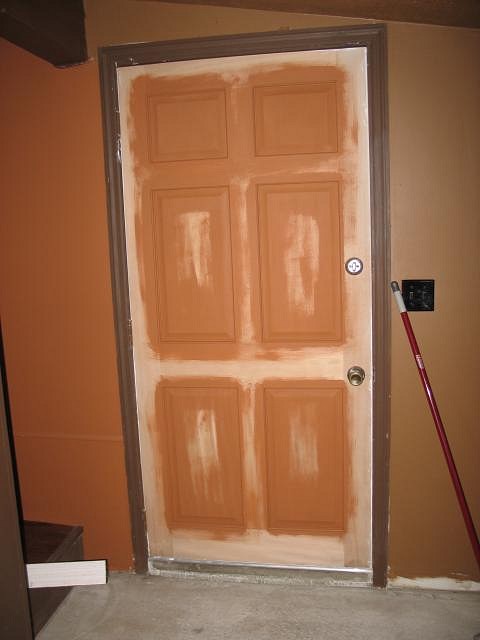
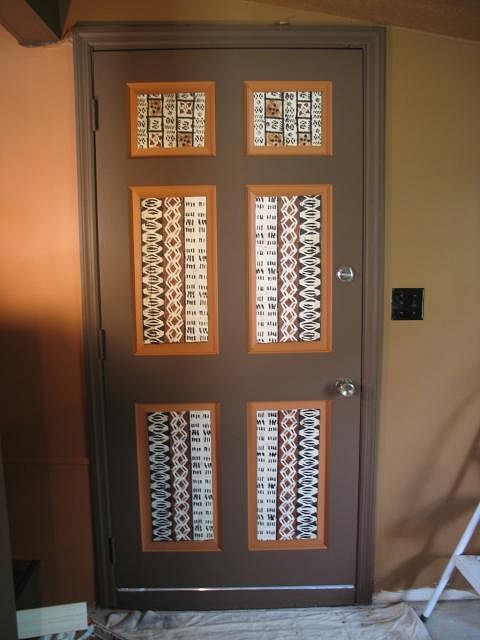
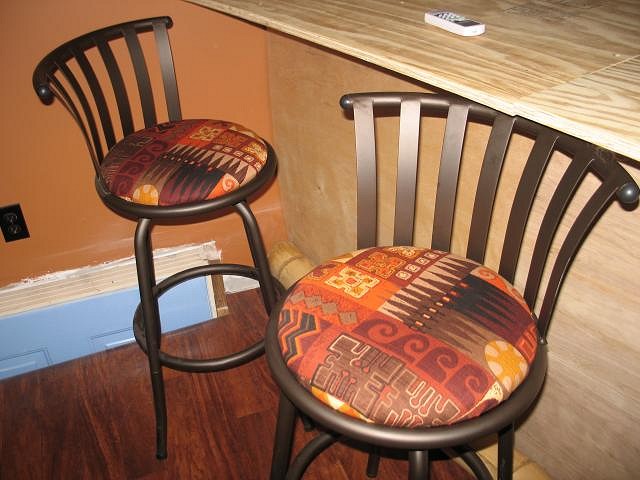
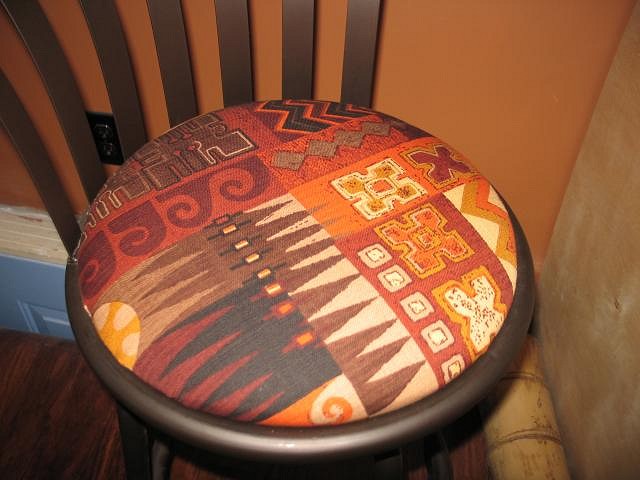
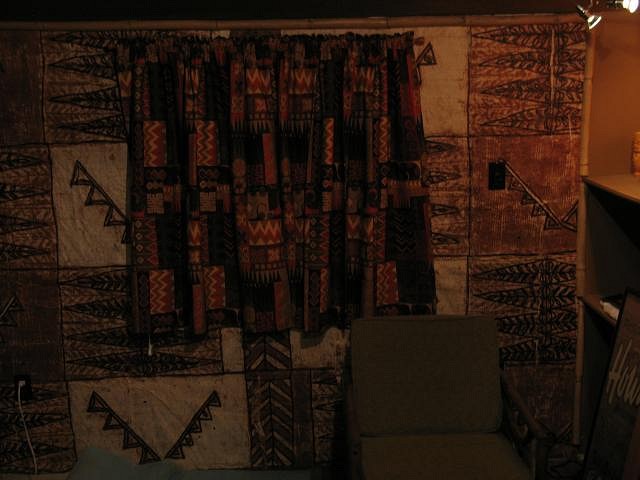
July 19th, 2008 Did some finishing under the thatch. Where I had painted the ceiling black had to be painted back to match the wall. The new white door had to be fixed. Painted the inner edges the burnt orange from the walls. Ms. Swanky found a bunch of this fabric on Ebay and covered all the stools and we put it up as curtains over the back window in the Tapa Room. |
|
L

leleliz
Posted
posted
on
Sun, Jul 19, 2009 6:59 PM
The door transformation really came out nice. Great work..its coming along awesome. |
|
QK

Queen Kamehameha
Posted
posted
on
Tue, Jul 21, 2009 2:29 PM
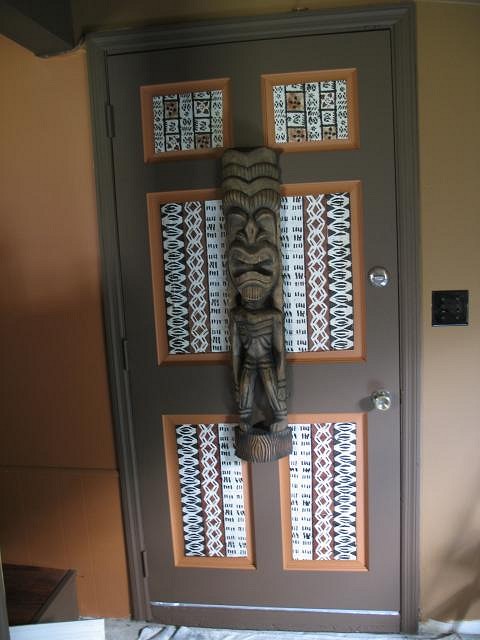
Looking good, love the tapa door panals, nice tough. The whole project is coming together! Amy |
|
T

TikiPops
Posted
posted
on
Thu, Jul 23, 2009 8:33 AM
I really like the door treatment. The bar stools are cool too. The room is coming together with a nice vibe. |
|
S
Swanky
Posted
posted
on
Sun, Jul 26, 2009 7:09 AM
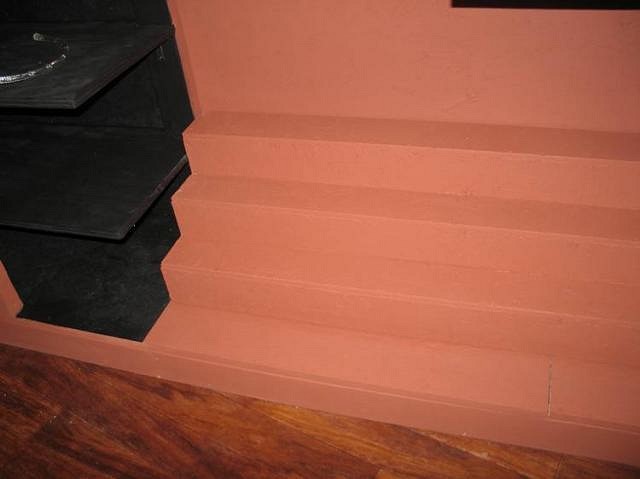
July 25, 2009
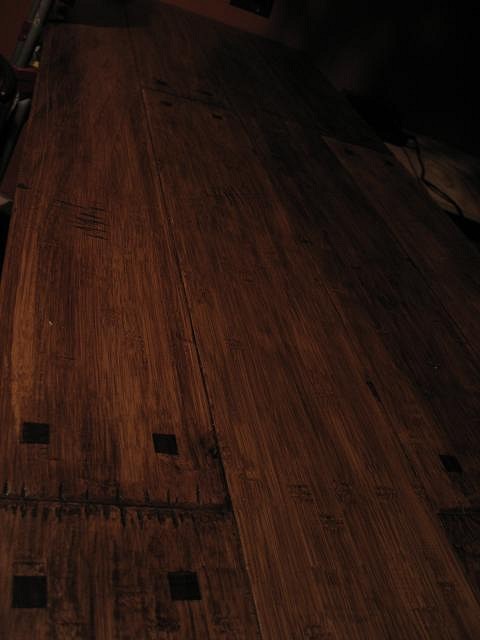
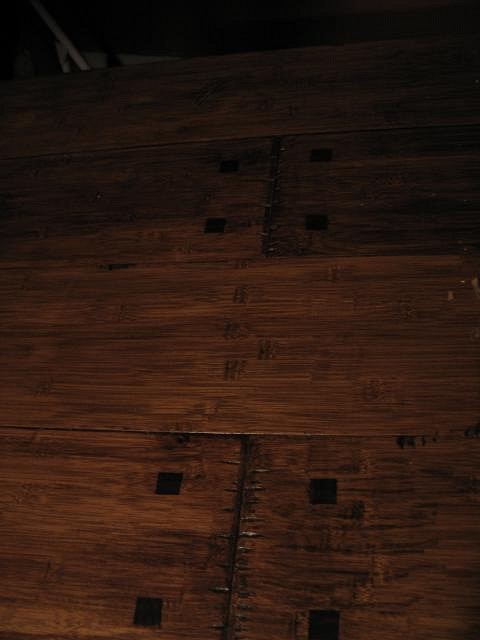
11 foot bar, that's near 3 feet deep, meant a lot of looking at flooring. We found what we wanted, and it turned out that one box would cover the whole bar. That was a very lucky break on this special order. We could not have bought another piece. Sahara is the color and it is very close to the look of the bar and tables at the Mai Kai. Ours has square pegs in it.
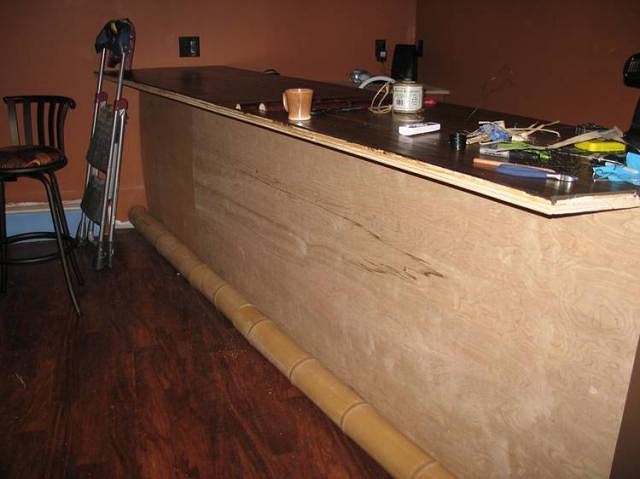
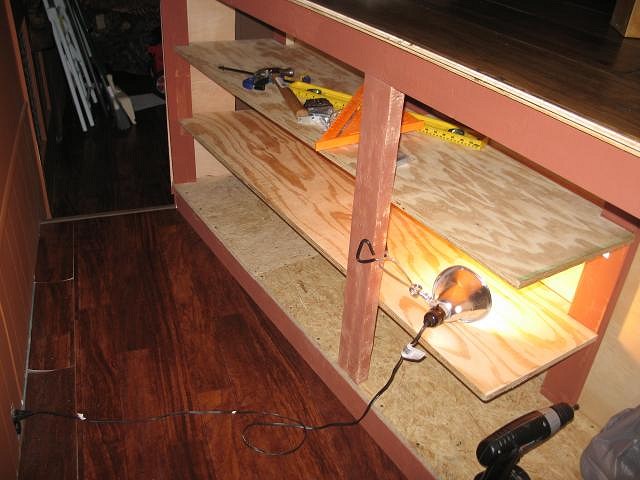
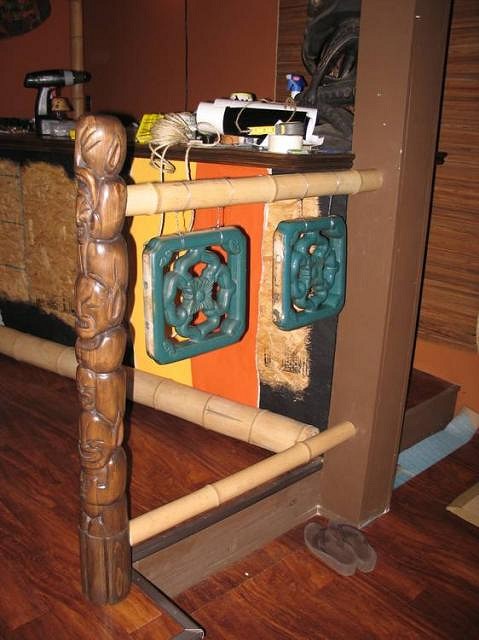
I also reworked the foot rest. Picked to good straight pieces of 5 inch bamboo and cut them to match. We'll do a little decoraing on them and screw them in when we do the bar front later. The bar moulding is cut and ready to go. Maybe stain it today. Looking to start the back bar now and tile it and install the sink, etc.
[ Edited by: Swanky 2009-07-26 07:12 ] |
|
IK

Iokona Ki'i
Posted
posted
on
Sun, Jul 26, 2009 10:19 AM
Love how you made the door look! Awesome job! |
|
M

machinelf
Posted
posted
on
Thu, Jul 30, 2009 12:15 PM
Great choice for the bar top, it looks fantastic. Love those pegs. Looking forward to continued progress! |
|
W

Wayfarer
Posted
posted
on
Fri, Jul 31, 2009 8:07 PM
I like the bar, the wood has a nice look to it with the square pegs. |
|
S
Swanky
Posted
posted
on
Sat, Aug 8, 2009 6:13 PM
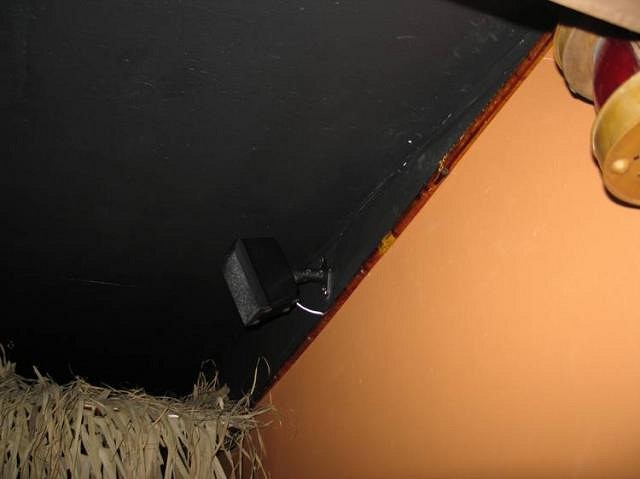
**August 8th, 2009 **
Installed the surround sound speakers and ran cable to the bar.
|
|
RH
Robb Hamel
Posted
posted
on
Mon, Aug 10, 2009 9:11 AM
Nice job - the square pegs really do seal the deal. |
|
S
Swanky
Posted
posted
on
Sat, Aug 22, 2009 5:44 PM
August 22nd, 2009
[ Edited by: Swanky 2009-08-22 17:48 ] |
|
S
Swanky
Posted
posted
on
Sat, Aug 22, 2009 5:44 PM
[ Edited by: Swanky 2009-08-22 17:54 ] |
|
SF

Slacks Ferret
Posted
posted
on
Sat, Aug 22, 2009 7:35 PM
Great stuff swanky. It's interesting to see your progress as you're doing some very similar things to what I'm doing... Like I said, it's looking great so far. |
|
1

1961surf
Posted
posted
on
Sat, Aug 22, 2009 9:17 PM
Nice work Swanky...I have been watching the progress on your project for awhile. |
|
S
Swanky
Posted
posted
on
Sun, Aug 23, 2009 7:30 PM
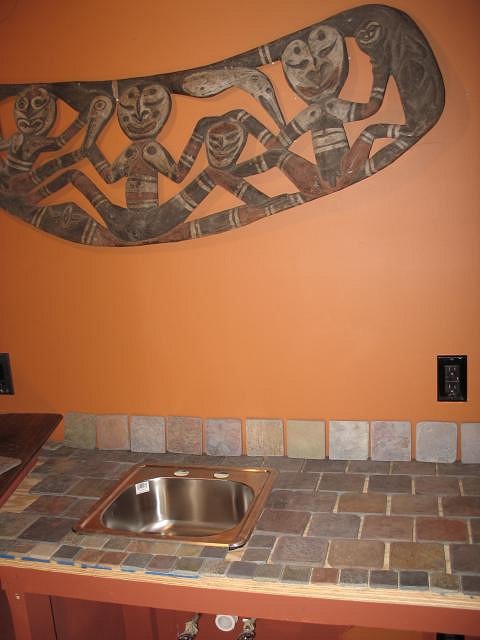
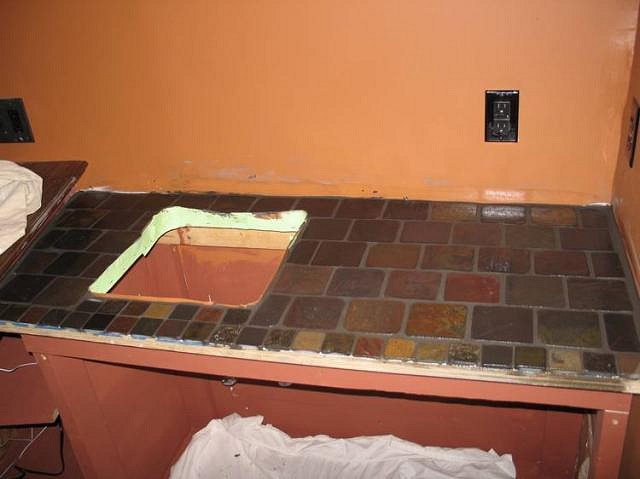
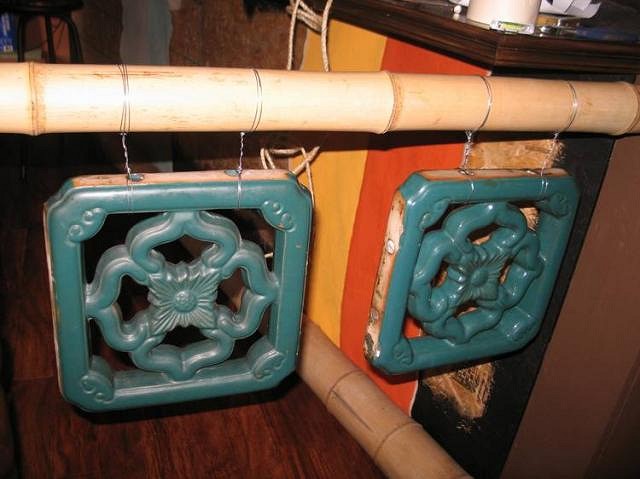
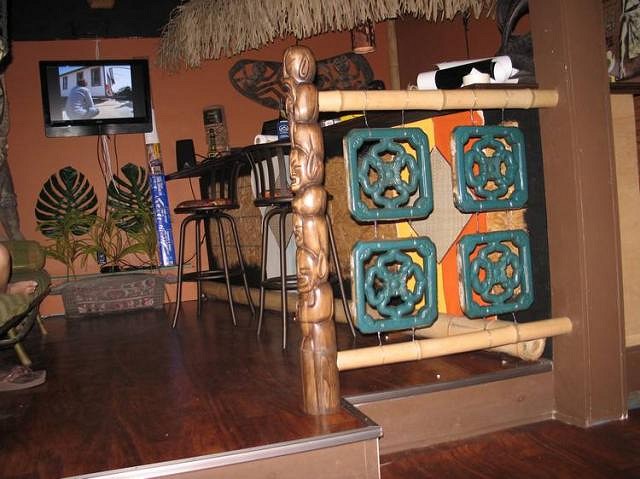
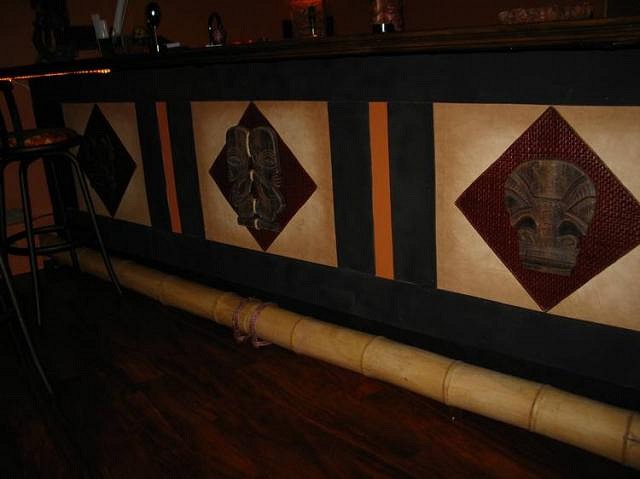
August 23rd Ms Swanky wired the ceramic tiles to the rails. Lots of flash here to show details. When we get done, there will be lots of appropriate lighting shots. Really down to details. Decor. Painting. Touch-up. Should be shaking and serving for Labor Day! |
|
BK
Big Kahuna
Posted
posted
on
Sun, Aug 23, 2009 9:07 PM
WOWZA!!!!! |
|
E

exotica59
Posted
posted
on
Mon, Aug 31, 2009 9:11 PM
wow! You can really be proud of all the hard work you have put into this Swanky! Looks great. I love the step by step photos. |
|
LS
Lake Surfer
Posted
posted
on
Mon, Aug 31, 2009 11:26 PM
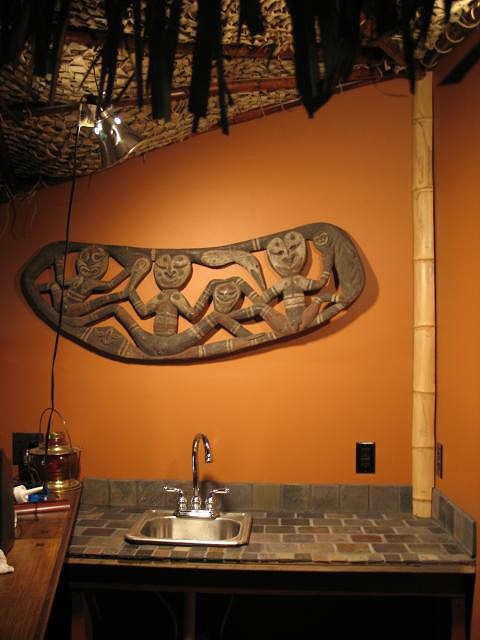
Really nice work, Tim! Well thought out and executed. No worries on the TV, sometimes I wish I had one in the bar to watch surf videos and such... like you said, making more use of the room besides just drinking and entertaining. Gonna put some money aside so I can get something small in there and do just that. Love the sink too with the tile treatment! A sink is the other item I wish I had. Your overall handling is much like the direction the last 2 Trader Vic's went with (Chicago and L.A.) Classic tiki with a modern touch. Enjoy your opening, you deserve it! |
|
S
Swanky
Posted
posted
on
Tue, Sep 1, 2009 5:59 AM
Lots of pics to post, but no time! It has rteally taken shape in the last week or so. Got your pieces up on the bar last night Lake. Now we also have to clean the house and get the yard ready, so, probably no pics until Monday... I am pretty amazed myself and that says a lot. It is more than it's parts. |
|
M

Murph
Posted
posted
on
Tue, Sep 1, 2009 3:26 PM
Looks great! Love the Chinese tiles :D |
|
T6

tiki 65
Posted
posted
on
Tue, Sep 1, 2009 6:22 PM
Here is a new addition to the hideaway. Her name be Becky Heres how she came to be
Closeup of upper torso
Gold leafed the mount
Full body shot
Last but not least
For more of this rebuild go to this link http://www.flickr.com/photos/tiki65/sets/72157622083749009/ Swanky we've had some great fun. Congrats on the bar. It looks Great. Aloha Tiki 65 PS Thanks for not taking any more butt shots of me :) My bodys in the south but my mind is in the South Pacific............ALOHA [ Edited by: tiki 65 2009-09-01 18:45 ] |
|
S
Swanky
Posted
posted
on
Mon, Sep 7, 2009 1:51 PM
|
|
BK
Big Kahuna
Posted
posted
on
Mon, Sep 7, 2009 4:57 PM
Awright, Swanky! Killer room! |