Tiki Central / Other Crafts / MadDog Mike's Platterful of Pupule - Pele Fence Hanger
Post #601344 by MadDogMike on Sun, Aug 7, 2011 11:47 AM
|
M

MadDogMike
Posted
posted
on
Sun, Aug 7, 2011 11:47 AM
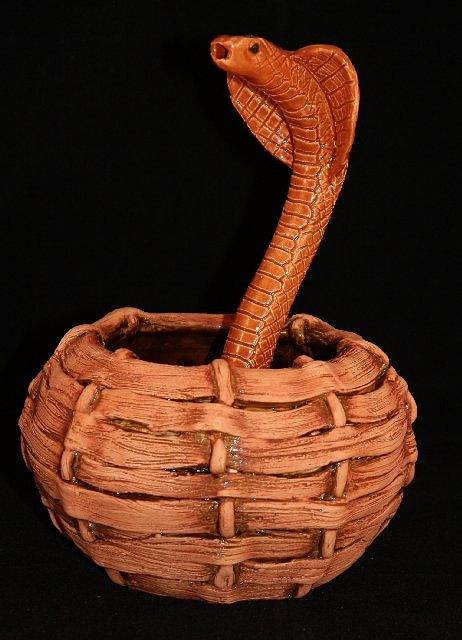
Henrik and Paul, thank you. Melvin sold to one of our great TC Ohana, I get to deliver him at Oasis. Chuck, Wendy, Robb - sorry to pull your leg with the fake amber but I was feeling mischievous :wink: This next one is not really Tiki but I'll add a tip and a little technical info and maybe I'll be forgiven. I made a Cobra Mug a few years back and decided to do another version for a friend. I didn't really improve on the cobra much but the basket is better (and holds more rum too!) The left is the original and the right is the "New and Improved!" version. They are about the same overall height so you can see the volume is significantly increased. Like the original, the cobra serves as a straw, you suck on the head to get the drink :D The basket was done by making 2 identical bowls. joining them together and cutting the top off. Then I cut strips of clay and wove them around the bowl. Since the inner bowl was already sealed, the woven strips are purely decorative and don't need to seal together. In fact, they are only slipped to the bowl at the top and bottom - this creates little crevices under the strips for more texture. If you are making several pieces of one shape, you would make a plaster mold but I often want just one of something. I find interesting objects that I can wrap clay around to make something. But it can be difficult to remove the clay from the form. If you are using something simple like a PVC pipe, you just wrap it in newspaper before you put the clay on but that won't work for more complex shapes. Here are a couple of found objects; a Captain Morgan tin that held a pair of pajamas and a $1 plastic pilsner glass from WalMart. I know I'm over my allotted time, anyone still with me? :lol: My little kiln has a manual control and no pyrometer (thermometer) so I recently got an inexpensive digital pyrometer. When I glaze fired my Cobra Mug yesterday, I tracked and graphed the temperatures. Hey look, mister. We serve hard drinks in here for men who want to get drunk fast, and we don't need any characters around to give the joint "atmosphere". Is that clear? [ Edited by: MadDogMike 2011-08-07 14:56 ] |