Tiki Central / Other Crafts / BeezleBug Mugs (Pg. 14: Paintings)
Post #411295 by BeezleBug on Thu, Oct 2, 2008 12:03 PM
|
B

BeezleBug
Posted
posted
on
Thu, Oct 2, 2008 12:03 PM
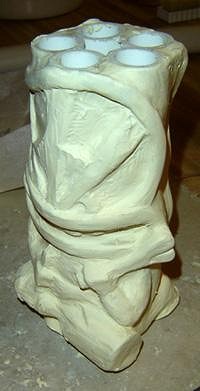
Thanks MadDogMike, Bowana, and Little Lost Tiki. More mugs on the way... As promised, here's a behind-the-scenes look at my mug-making process. Many of the ideas came from other mug makers on this site... I started with Roma Plastilina No. 2 over five lengths of PVC pipe hot glued together. I wanted a shape that was less cylindrical and more dimensional. No. 2 is pretty stiff, so it gives your hands a good work out - but, it holds its place well so the sculpt can be handled. The little Tiki guy overhangs the base and sides quite a bit, so I counted on creating a 5 piece mold.
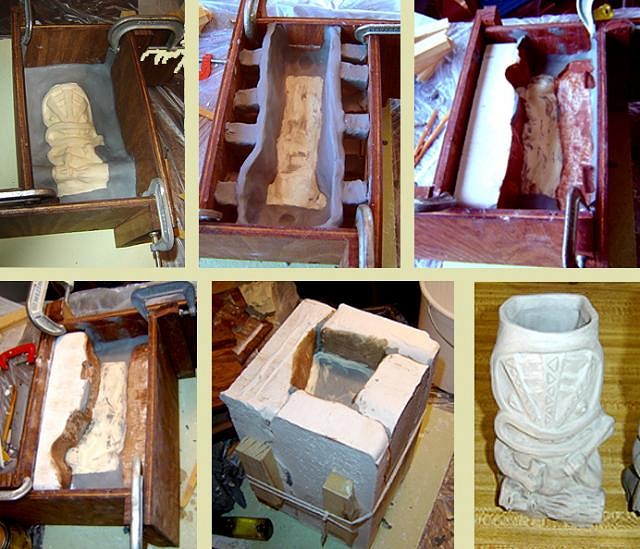
To make the mold, I built a set of mold walls out of scrap wood. First, I cast his front by surrounding the sculpt with cheap, gray, non-drying child's clay (he kinda' looks like Han Solo in carbonite). I used generic Plaster No. 1 to pour each mold piece. After the front, I flipped him over and cast his back (which is an abstracted piece of wood). I built walls from the gray clay. For supports, I cut off lengths of the square clay tubes. Next, I cast his right side, then his left side. Last, I cast the bottom. At this point, I didn't have any straps , so I tied the mold togther with string and added wood blocks to make everyhting tight. I used some old shellac I found in the garage to cover the cast plaster parts that came in contact with new plaster (although I've since switched to Murphy's Oil Soap). With the plaster dry, I used pre-mixed, non-toxic Amaco slip to slipcast the actual mug. All the fine lines on the mug were added during the clean-up phase. One challenge was getting the slip to mix consistently. The first two mugs wound up shrinking more than the last four.
The slip fired at cone 05. I had an acquaintance at the local art center do the firing for me. I used 2 to 3 coats of Stroke And Coat glaze. Thumb Green, Candy Apple Red, Sunkissed, and a mixture of those colors. Stroke And Coat fires at cone 06, doesn't really drip, and is easy to apply. It comes out very bright and vibrant, however, so it might be considered too happy and neon-ish compared to the dark browns and greens of many Tiki mugs. One thing I'll need to practice is getting a good consistency of my glaze thickness. My first mug came out a little too splotchy for my taste.
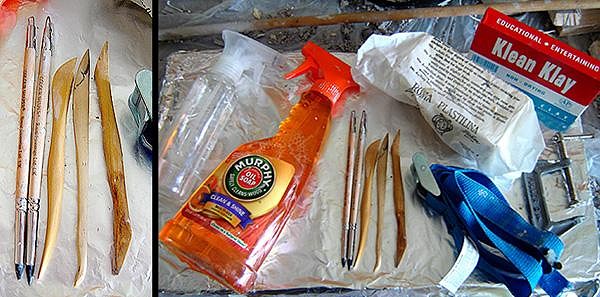
Here are the tools I relied on the most. Two Colour Shapers with rubber tips (one pointed and the other flat). Miscellaneous wood clay tools. Water spray bottle. Orange Murphy's Oil Soap. Murphy's works well as a mold soap, and can be used to smooth out the Plastilina sculpt. Plus, it's non-toxic and has a lovely orange scent. Nylon straps for holding the mold together. Plastilina No. 2. "Klean Klay" child's clay, which is super-cheap but is probably too greasy as it sticks to the Plastilina too much. C-clamps. And big dowel to mix the slip. I've also picked up a miniature lazy susan. [ Edited by: BeezleBug 2008-10-03 22:05 ] |