Tiki Central / Other Crafts / Tiki-On-A-Budget
Post #449858 by dcman on Sun, Apr 26, 2009 6:15 PM
|
D

dcman
Posted
posted
on
Sun, Apr 26, 2009 6:15 PM
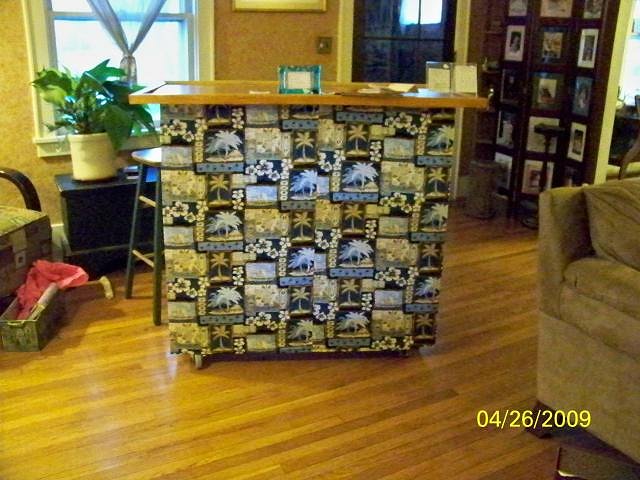
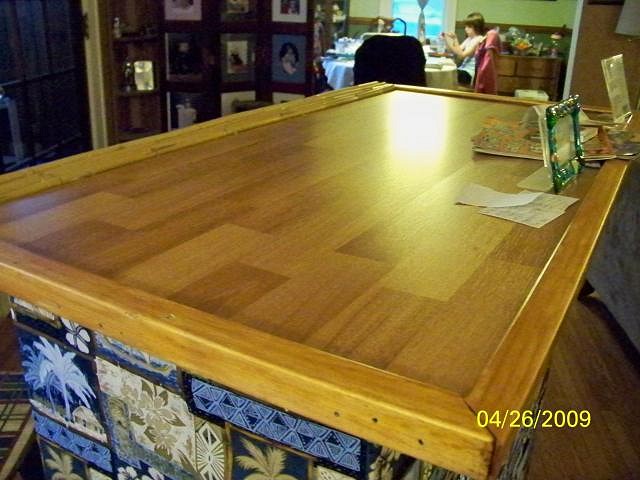
How to build a tiki bar on a budget - this is what it looks like. This is a relatively easy project, and took me several days, working 1-3 hours a day. It goes VERY quickly if you get your wood pre-cut and stain your trim ahead of time:
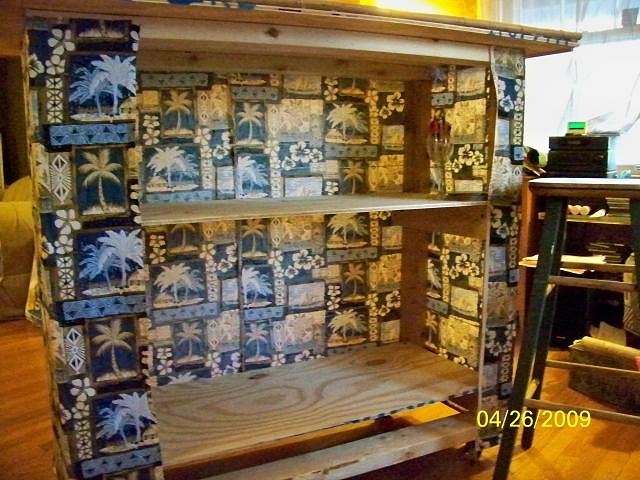
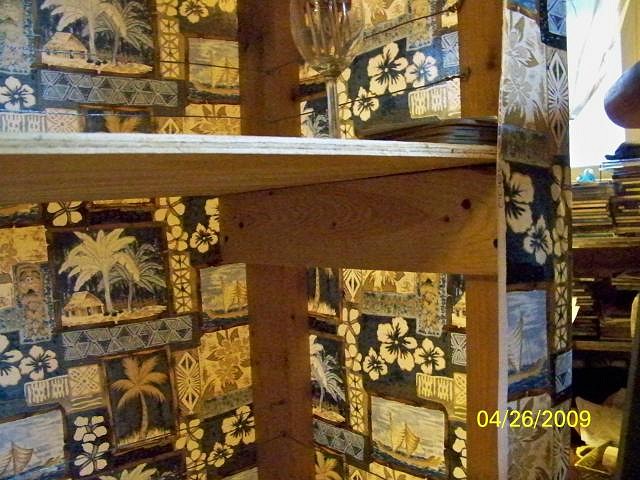
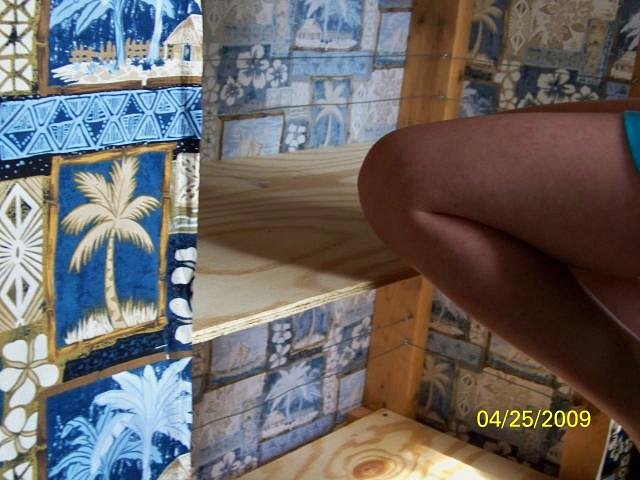
Here is is from the back. Notice that basically the tiki bar is a box on wheels. It's basic shape is made with 2 rectangles created with 2x4 lumber, one that makes up the front face of the bar and one that makes up the back face. horizontal lengths (top and bottom) - 42 inches these rectangles are then attached with 2 2x4s on each side to connect the boxes and to brace them. One at the bottom, one around 20 inches up from the bottom. Your bracing 2x4x determine the depth of your bar, I chose 18 inch braces (and thus 18 inch shelves), because I felt this provided good stability without making bar so deep I would lose things in it. Again, make sure your connectors are long enough to go through both pieces of wood. I used screws for this. On the top of the bracing 2x4s, I put my two plywood shelves, which are 38 x 18 to make them fit perfectly. Screw these into the top of your bracing 2x4s.
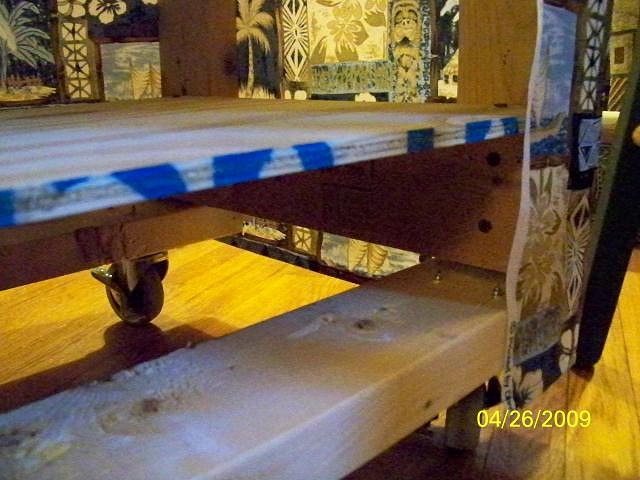
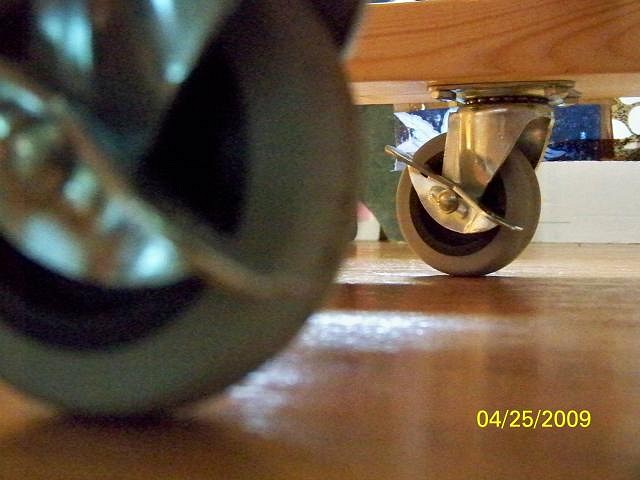
I used 3-inch casters, which are solid enough to hold up to the weight of the bar. I connected these to my bottom 2x4 with 5 -2inch lag bolts for each caster (20 lag bolts total). Don't cheap out your casters or skimp on your connectors, this is the part of your bar that takes ALL the weight and cheap casters will break and too short or too small connectors will rip out of the wood.
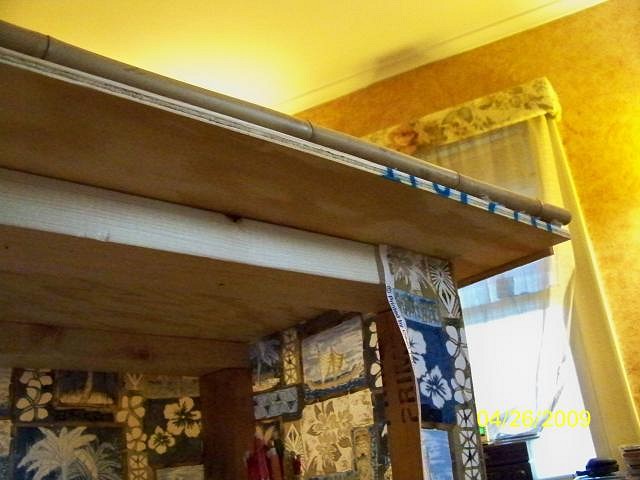
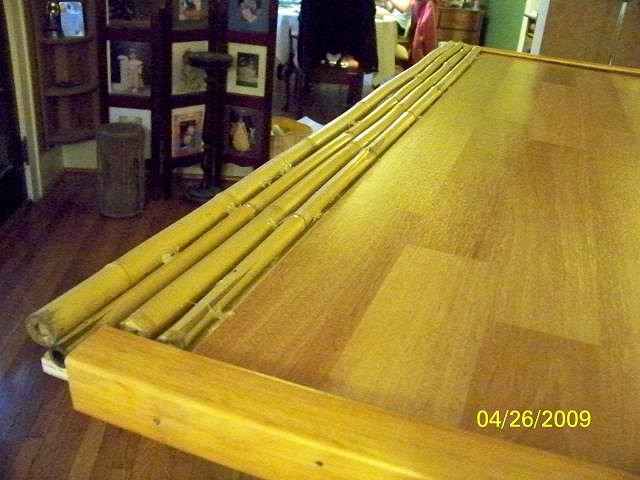
My bartop is made up of 3 sheets of leftover laminate flooring. You can use laminate flooring, leftover hardwood flooring, whatever you want. It's hard to give correct measurements here, because your plywood base size is determined by the size of your bar material. Given that I didn't want to bother with cutting my laminate, I based my plywood size on the size of my material. I made a plywood base, slightly larger than the flooring/bartop, so that there is maybe 1/4 inch extra plywood on all 4 sides. My plywood base is around 48 x 26, which I think is about perfect. The laminate actually floats, and is held in place by the trim, which overlaps at the top of the laminate (horizontally) and over the side of the plywood (vertically). The trim was actually the most expensive part of my project, and was a special "L" shaped trim that most home stores (Lowes, Home Depot) sell by the linear foot. I screwed the plywood into the top of my "box" (be sure to center this correctly), placed my laminate on top of the plywood, centered it, and then attached the trim with finishing nails. I only trimmed 3 sides of my bar, and hot-glued several strips of bamboo in as my rear bumper (I had to make sure to leave a few extra inches of plywood to do this. I think the bamboo makes the bar unique, but you could simply trim the whole bar if you wanted).
I then used some leftover picture hanging wire and and eye screws (or whatever they're called) to make a railing on the inside of the bar, on the sides and front, 2 rows at maybe 3 and 5 inches above each of the two shelves. Then I stapled fabric around the sides and front of the bar. My wife kindly sewed 2 pieces of fabric together to make it fit.
And your bar is done! Cost: 2x4 studs, 96 inch lengths, 2.11 apiece - $8.44 total price if everything was bought new- slightly less than $150.00 You can dramatically lower the price by using whatever leftover material you have laying around. I never counted it all up exactly, but I doubt I paid over 75 additional dollars for materials, as I simply used my extra "stuff". This is a flexible design that can be altered easily, so you can put your own spin on it with a minimum of effort. You don't need to put in the casters (just increase your vertical lengths by 3 inches to get the same height), but I like the option of being able to move the bar from room to room and it's still fairly stable. Just be careful not to make your bar so wide that it can't fit through doorways. Tip #1 - A no-brainer way to level the bar is to build the 4 rectangles, then screw in the casters. Then, with the caster wheels on the floor and a friend to hold them vertical, screw in the braces. That way, all 4 caster are leveled and on the floor when you make the box. Tip #2 - If you don't have a table or circular saw, most home stores will cut your large wood pieces for you. Mine did the first 2 cuts for free, then 50-cents for each cut after that. Tip #3 - Most home stores almost always have laminate or hardwood clearance items laying around. You and several buddies could split the cost of a box for your bartop, the stain, and for the plywood. If none of you have a miter box for cutting the trim, you could split the cost of a cheap one (maybe $20) Tip #4 - Most likely, you have leftover 2x4s, the picture hanging materials and some of the connectors you need laying around. Tip #5 - Most fabric stores run serious sales and offer online coupons. Good luck! dcman [ Edited by: dcman 2009-04-26 18:37 ] [ Edited by: dcman 2009-04-26 18:43 ] [ Edited by: dcman 2009-04-27 03:26 ] |